The IDE provides the Mobile Web palette that allows the user to make interactive web applications. This palette offers a wide range of features including drag-and-drop widgets for adding common web interface framework features such as HTML5, jQuery Mobile, and Ionic tags to html files. It also contains widgets like Panels, Pages, Lists, Buttons to make the applications more user friendly and efficient.
Use the instructions to complete the following steps:
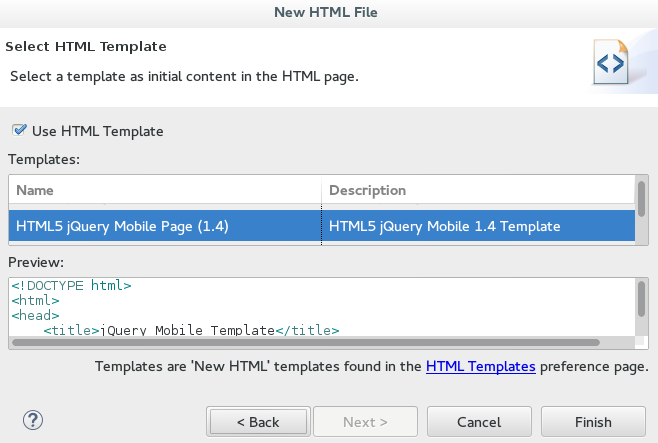
Add a New HTML5 jQuery Mobile File to a Project
The HTML5 jQuery Mobile file template consists of JavaScript and CSS library references that are inserted in the file’s HTML header. The template also inserts a skeleton of the jQuery Mobile page and listview widgets in the file’s HTML body. The following procedure details the steps to insert the template into your project.
To create a new HTML5 jQuery Mobile file in an existing project:
-
In the
Project Explorerview, expand [project name] >src>main. -
Right-click
webappand click . -
Complete the fields about the html file as follows:
-
Ensure the parent folder field shows
[project name]/src/main/webapp. -
In the
File namefield, type a name for the HTML5 file.
-
-
Click
Next. -
From the
Templatestable, selectHTML5 jQuery Mobile Page (1.4)and clickFinish.
Result: The new file is listed in the Project Explorer view under the project webapp directory and the file opens in the editor.
Add New Pages to the Web Application
Use the jQuery Mobile Page widget to add pages to your mobile web application as follows:
-
In the
Project Explorerview, expand [project name] >src>main>webapp. -
Right-click the new html file and click .
-
In the
Paletteview, click thejQuery Mobiletab to view the available widgets and clickPage. -
Complete the fields about the page as follows:
-
In the
Headerfield, type a name for the page header. -
In the
Footerfield, type a name for the page footer.
-
-
Click
Finish.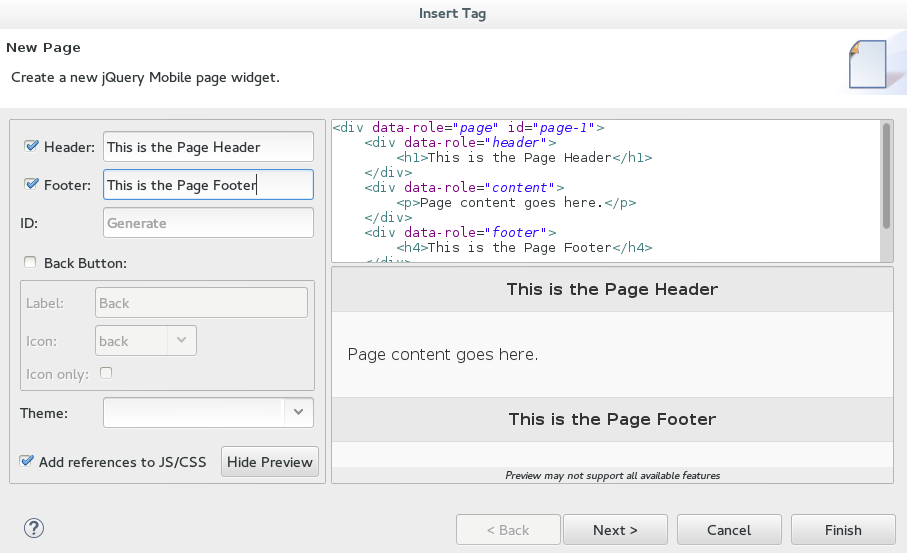 Figure 2. Adding a New Page
 -
Save the changes to the file by clicking the
Saveicon.
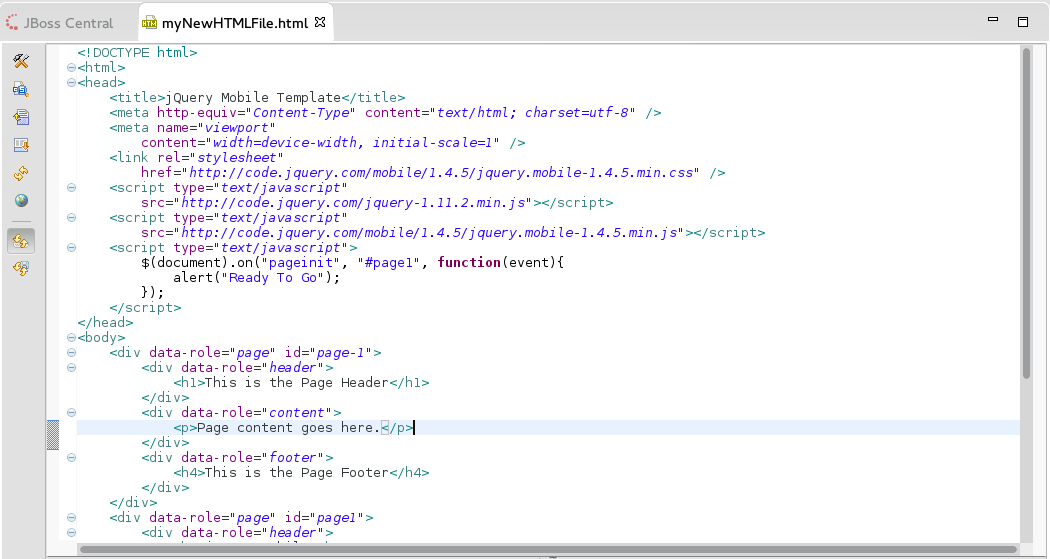
Result: A page is added to the html file. JS and CSS references are also automatically added to the file by the Page widget wizard.
Customize the Home Page of the Web Application
Use the widgets in the jQuery Mobile palette to customize the page. Use the instructions to add a menu to the page. This menu links to three other pages: Home, Search, and the Add Contacts page.
To create and add the menu to your application page:
Add a Panel to the Page
-
Place the cursor where you want the panel, in the html file.
-
In the
Paletteview, in thejQuery Mobiletab, clickPanel. -
Complete the fields about the Panel as follows:
-
In the
IDfield, typemy_panel_ID. -
Clear the
Add Menucheck box.
-
-
Click
Finish. -
Save the html file.
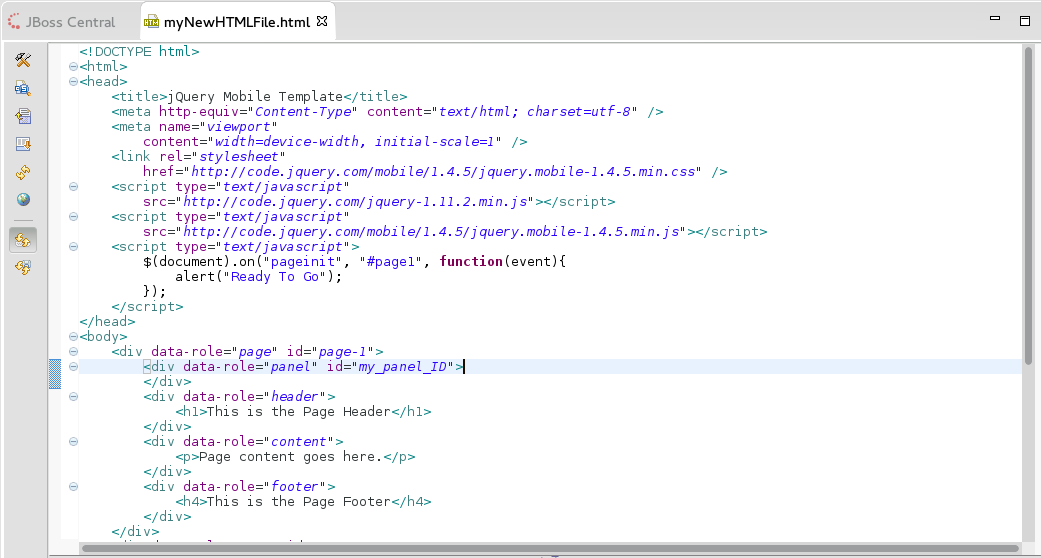
Result: A corresponding code snippet, for the newly added panel, is added to the html file where you had placed the cursor.
Add a List to the Panel
-
Within the panel’s code snippet, place your cursor at the desired location for the new list.
-
In the
Paletteview, in thejQuery Mobiletab, clickListView. -
Complete the fields about the ListView as follows:
-
In the
Itemssection,1tab, in theLabelfield, type the name for the first list item on the page. -
In the
URL (href)field, type a URL identifier for the label.
-
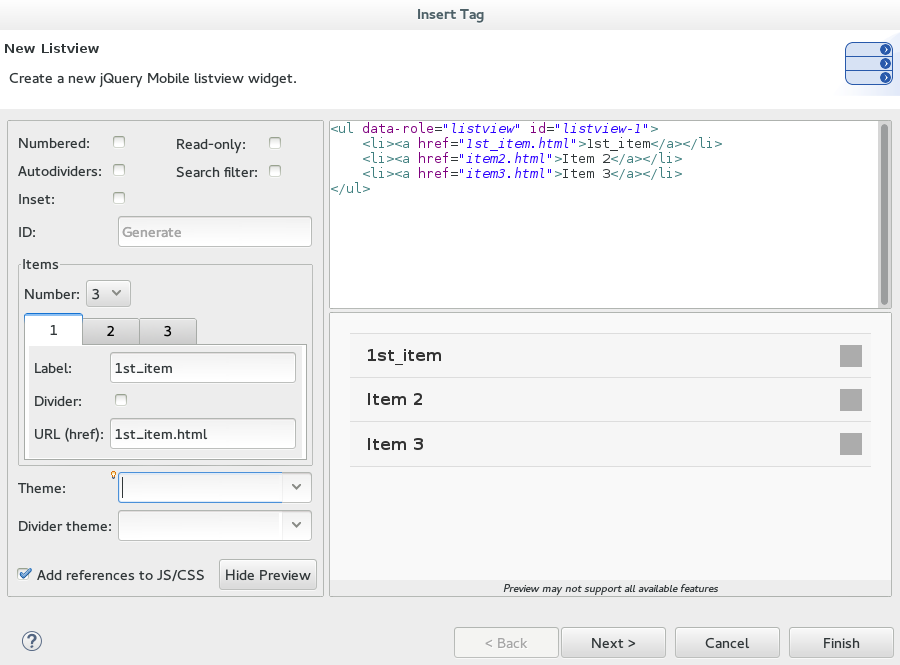
-
Click
Finish. -
Save the html file.
Result: The new list item name appears in the code snippet.
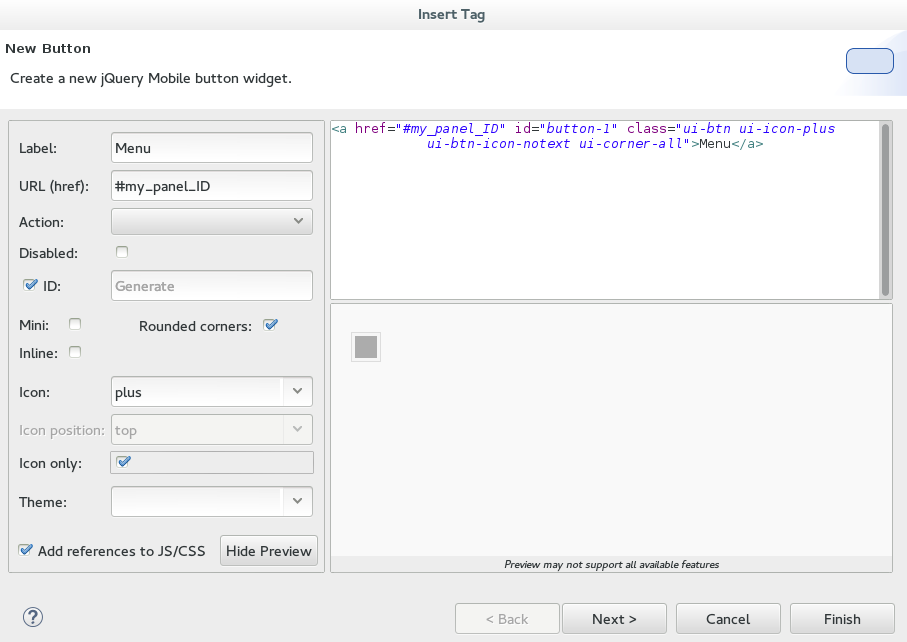
Add a Button in the Header of the Page to Display the List
-
Place the cursor within the header at the desired location for the new button.
-
In the
Paletteview, in thejQuery Mobiletab, clickButton. -
Complete the fields about the button as follows:
-
In the
Labelfield, typeMenu. -
In the
URL (href)field, type#followed by the panel ID (#my_panel_ID, in this case). -
In the
Iconlist, select an icon. -
In the
Icon positionlist, select a desired value. -
Select the
Icon onlycheck-box.
-
-
Click
Finish. -
Save the html file.
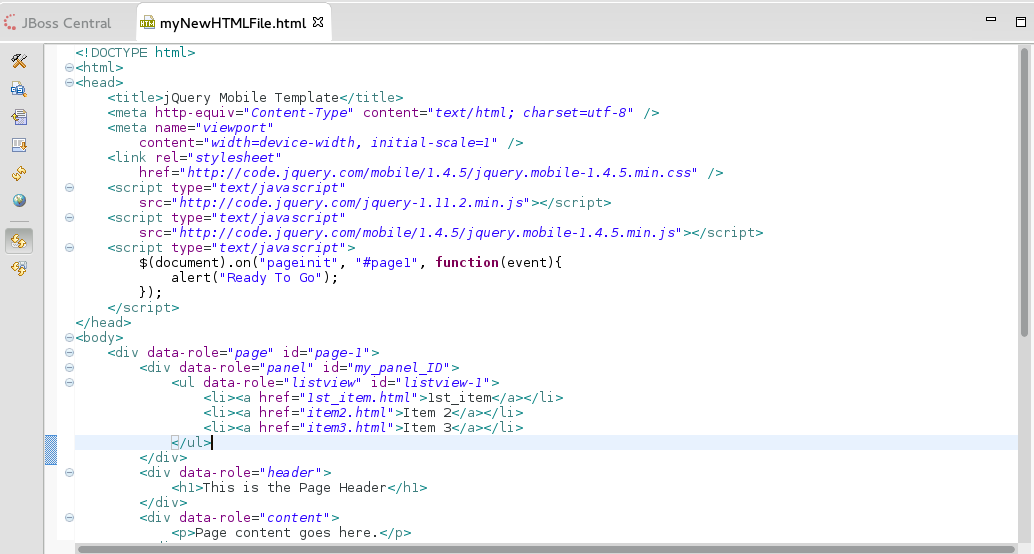
Result: The following code is added to the body of the html file.
<div data-role="page" id="page-1">
<div data-role="panel" id="my_panel_ID">
<ul data-role="listview" id="listview-1">
<li><a href="1st_item.html">1st_item</a></li>
<li><a href="item2.html">Item 2</a></li>
<li><a href="item3.html">Item 3</a></li>
</ul>
</div>
<div data-role="header">
<h1>This is the Page Header</h1>
<a href="#my_panel_ID" id="button-1" class="ui-btn ui-icon-plus ui-btn-icon-notext ui-corner-all">Menu</a>
</div>
<div data-role="content">
<p>Page content goes here.</p>
</div>
<div data-role="footer">
<h4>This is the Page Footer</h4>
</div>
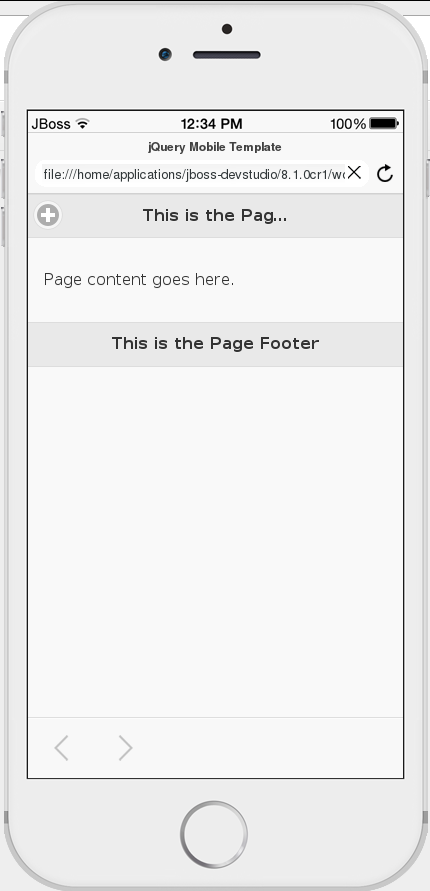
</div>Run and Test the HTML5 Mobile Application Using BrowserSim
Test the newly added elements to the application by navigating to the interface on BrowserSim as follows:
-
In the
Project Exploreview, expand [project name] >src>main>webapp. -
Right-click the changed html file and click .
Result: A simulated device appears and displays the application.
Did You Know?
-
To access the
jQuery Mobilepalette when thePaletteview is not visible, click , expandGeneraland selectPalette. -
Add BrowserSim in the toolbar by clicking and select
BrowserSimunderCommand Groups Availability. It appears as a Phone icon in the toolbar. -
Use the
Panelwidget to create menus, collapsible columns, drawers, and more. TheList Viewwidget is an unordered list containing links to list items. jQuery Mobile applies the necessary styles to make the listview mobile friendly. -
Add contacts to the
Add Contactspage by following the above listed procedure. You can addName,Email,Phone Numberfields to theAdd Contactspage by using theText Inputicon in theMobile Webpalette.