OpenShift Online uses SSH authentication for development tasks that interact directly with gears such as pushing code changes to application OpenShift Online Git repositories, reading application log files, listing and setting environment variables, and port forwarding.
You must have an SSH key pair configured for your OpenShift Online account before using OpenShift Tools features to create, edit and manage OpenShift Online applications. This requires a private-public key pair, with the private key stored on your local system and its location specified in the IDE and the associated public key stored on the OpenShift Online server and associated with your account.
OpenShift Tools enables you to quickly complete these requirements with the assistance of a multipurpose SSH wizard. If you are new to OpenShift Online, the wizards can help you configure a new or existing SSH key pair. If you are already using OpenShift Online through the web interface or RHC client tools, you only need to specify the private key location in the IDE preferences to complete the SSH key configuration.
The instructions here demonstrate how to complete the following tasks:
Option A: Create and Use a New SSH Key Pair
You can use the OpenShift Tools Manage SSH Keys wizard to create a new SSH key pair. In addition to creating an SSH key pair, this wizard completes the OpenShift Online SSH configuration process by automatically uploading the public key to the OpenShift Online server and setting the location of the corresponding private key in the IDE preferences. This option may be applicable if you have not used your system with OpenShift Online before.
To create and use a new SSH key pair, complete the following steps:
-
In the
OpenShift Explorerview, right-click the connection and clickManage SSH Keys. -
In the
Manage SSH Keyswizard, clickNew. -
Complete the fields about the new SSH keys as follows:
-
In the
Namefield, type a name to distinguish the key pair from any other keys associated with the connection. -
From the
Key Typelist, selectSSH_RSA. -
Ensure that the
SSH2 Homefield contains the location where you want to create the files associated with the key pair. To change the location, clear theDefaultcheck box and type the location in theSSH2 Homefield or clickBrowseto navigate to the desired location. -
In the
Private Key File Namefield, type a name for the private key file. ThePublic Key File Namefield is automatically completed and displays the private key file name appended with.pub.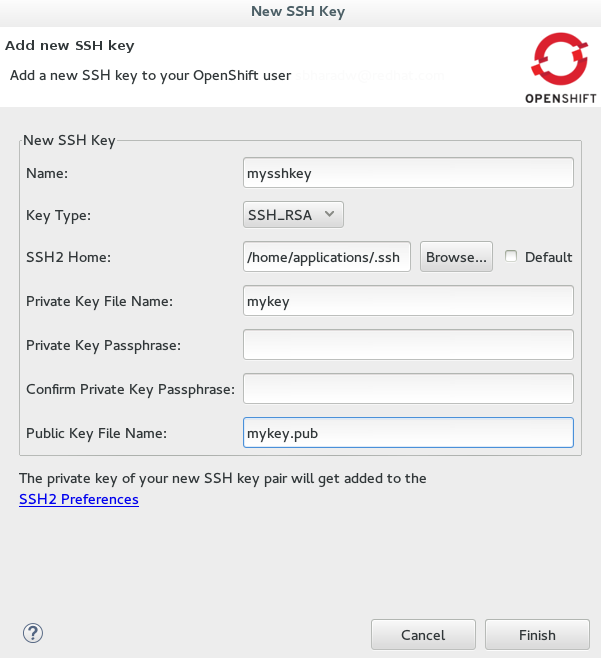 Figure 1. Completed Fields for the New SSH Key Pair
-
-
Click
Finishand clickOKto close theManage SSH Keyswizard.
Option B: Use an Existing SSH Key Pair
You can use the OpenShift Tools Manage SSH Keys wizard to use an already generated SSH key pair with OpenShift Online. This wizard uploads the public key to the OpenShift Online server and sets the location of the corresponding private key in the IDE preferences. This option may be applicable if you have removed a SSH key pair from your OpenShift account, still have the generated key files available on your system and want to reassociate them with your OpenShift account.
To use an existing SSH key pair, complete the following steps:
-
In the
OpenShift Explorerview, right-click the connection and clickManage SSH Keys. -
Click
Add Existing. -
Complete the fields about the existing public SSH key as follows:
-
In the
Namefield, type a name for the SSH key. -
In the
Public Keyfield, type the path of the public key file or clickBrowseto locate the public key file.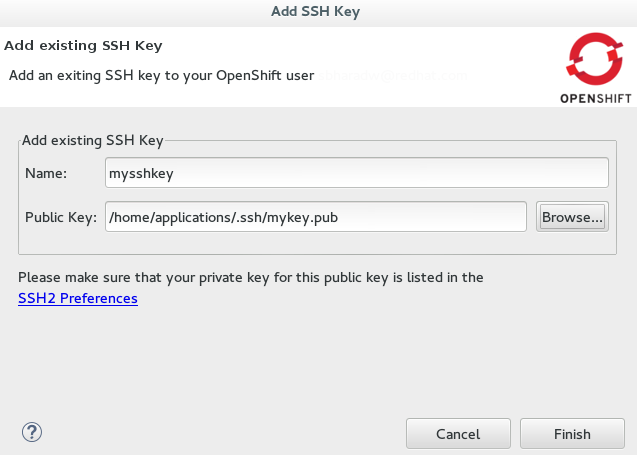 Figure 2. Completed Fields for Adding an Existing SSH Public Key
-
-
Click the
SSH2 Preferenceslink. -
In the
Private keysfield, clickAdd Private Keyand locate the private key file. -
Click
Applyand clickOKto close thePreferenceswindow. -
Click
Finishand clickOK.
Option C: Specify an Existing Private Key File
When using a public key that is already uploaded to OpenShift Online, you must ensure the location of the corresponding private key is set in the IDE preferences. This option may be applicable if you are an existing OpenShift Online user and you have not yet accessed OpenShift Online from your IDE workspace or you are using multiple IDE workspaces.
To specify an existing private key file, complete the following steps:
-
Click .
-
In the
Generaltab, clickAdd Private Keyand locate the private key file. -
Click
Applyand clickOKto close thePreferenceswindow.
Did You Know?
-
To quickly open the
OpenShift Explorerview, in theIDE Quick Accessfield typeOpenShift Explorerand chooseOpenShift Explorerview from the list of items. -
For added security, you can add a passphrase to the private SSH keys associated with your OpenShift account when you create them. You must enter the passphrase for the specific key for each OpenShift Tools action that uses the SSH key for authentication with OpenShift Online.
-
IDE preferences are workspace specific and therefore you must specify private key location under
Preferencesfor each workspace. -
You can remove an existing public SSH key from your OpenShift Online account with the
Manage SSH Keyswizard. Note that this only disassociates keys with your OpenShift account. The files associated with a removed SSH key pair still exist in the local location where they were generated and the private key is still set in the IDE preferences. -
If you are using the OpenShift Online web interface or RHC client tools to manage SSH keys simultaneously with OpenShift Tools, the information specified by OpenShift Tools about keys may be out of sync. You can resync the information in the
Manage SSH Keyswizard with theRefreshbutton. -
You can change the default location used by the IDE to store newly created SSH keys. Click . In the
Generaltab, in theSSH2 homefield type the new location.
Troubleshoot SSH Key Issues
“You have no SSH public keys in your OpenShift account”
You have no SSH public keys in your OpenShift account user@example.com yet, please add your key(s) or create new one(s).
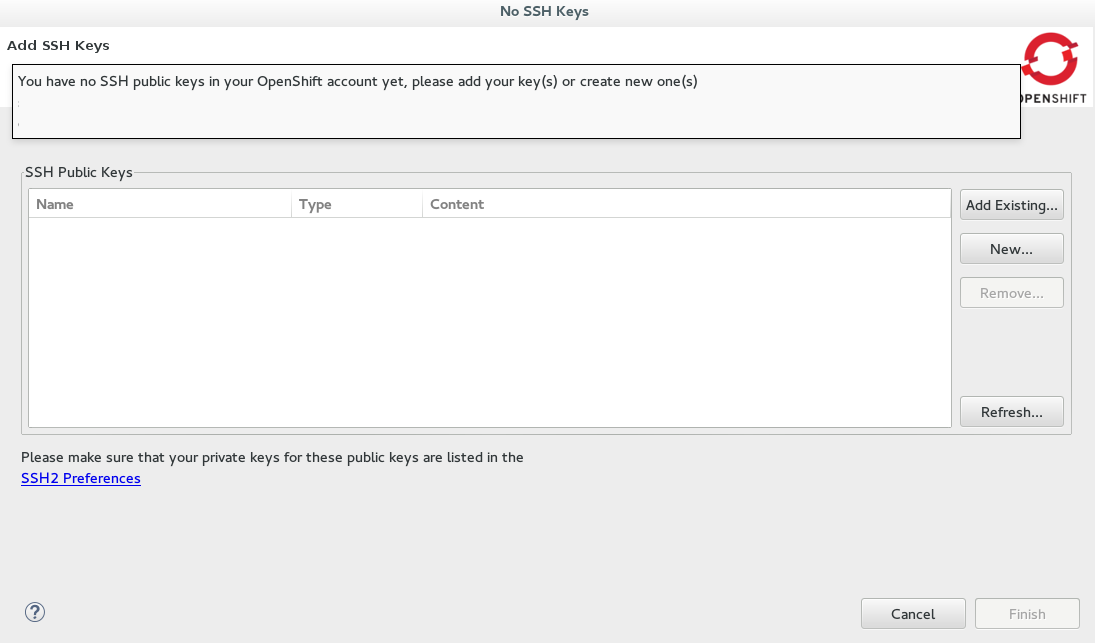
There are no SSH public keys assigned to your OpenShift account. After you have connected to OpenShift Online from the IDE, the No SSH Keys window appears informing you that there are no SSH public keys associated with your account.
In the No SSH Keys window, click Add Existing or New and add an SSH public key to your OpenShift Online account as detailed in Option A, Create and Use a New SSH Key Pair and Option B, Use an Existing SSH Key Pair above.
“Please make sure that you added your private key to the ssh preferences.”
Could not clone the repository. Authentication failed. Please make sure that you added your private key to the ssh preferences.
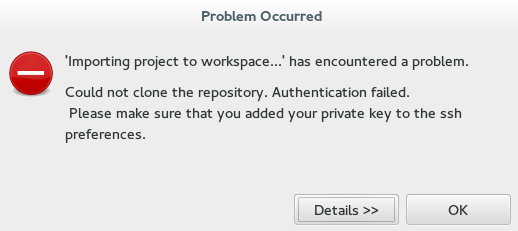
An SSH public key is associated with your OpenShift Online account but the IDE cannot locate the companion private key. Consequently, the IDE cannot complete actions for the OpenShift applications associated with your account. This error may be encountered when creating new OpenShift applications or importing existing OpenShift applications into the IDE.
Click OK to close the Problem Occurred window. The OpenShift Application wizard opens. Click the SSH2 Preferences link to add the private key as detailed in Option C, Specify an Existing Private Key Location above.