Through the IDE you can manage your OpenShift Online application beyond simply its source code. OpenShift Online allows customization of the build and deployment process with markers and action hooks, each of which can be added to the application configuration files using OpenShift Tools and existing IDE functionality. Further, the Git commit and push processes for your changed application source code and configuration files can be customized through the IDE preferences to meet your needs.
The instructions here demonstrate how to complete the following tasks:
1. Add a Marker to the Application
OpenShift Tools provides the Configure Markers wizard for adding markers to and removing them from your OpenShift application. The wizard lists markers that are already applied to your application and those that are available to add given the cartridge configuration of your application. The wizard manages the adding and removing of markers from your application, creating or deleting marker files and adding or removing them from the Git index respectively.
As an example, here the hot deploy marker is added to the application, which triggers OpenShift to publish application changes without first restarting the application cartridges and hence making the republishing faster.
To add the hot deploy marker to the application, complete the following steps:
-
In the
Project Explorerview, right-click{project name}and click . -
From the
Markertable, selectHot Deployand clickOK.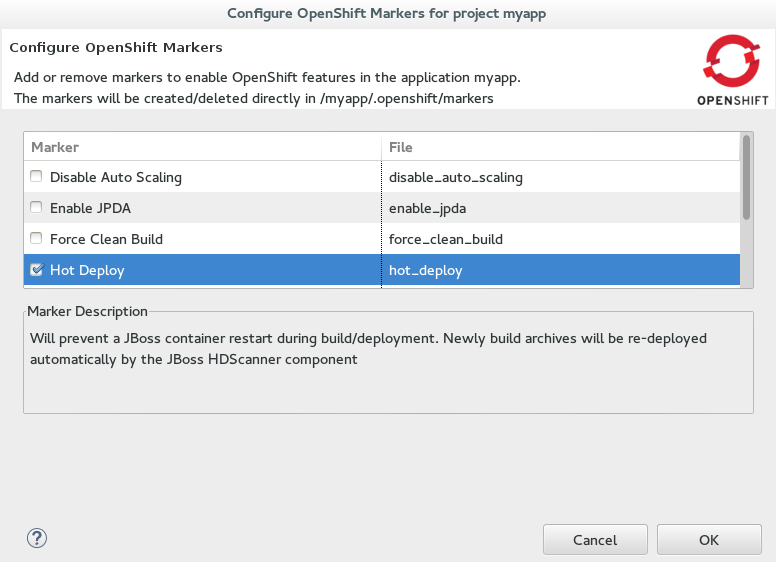 Figure 1. Hot Deploy Marker Selected
An empty
.openshift/markers/hot_deployfile is added to the application. OpenShift Tools automatically completes thegit addaction so that this new file is added to the Git index and can be committed and pushed to the OpenShift application repository when ready.
2. Add an Action Hook to the Application
Using IDE features, you can quickly add action hooks to your OpenShift application. Adding an action hook requires creating a script file named according to the phase in which it is to run, locating it in the application .openshift/action_hooks directory, adding the file to the Git index and ensuring the file is executable by all.
As an example, here a post deploy action hook is added to the application, which triggers a simple bash script to execute on the application main gear after the application is deployed.
To add a post deploy action hook to the application, complete the following steps:
Create the post deploy action hook
-
In the
Navigatorview, expand{project name} > .openshift. -
Right-click
action_hooksand click . -
In the
File namefield, typepost_deployand clickFinish. -
In the file editor, add the following lines to the post_deploy file:
#!/bin/bash echo "This is my post-deploy bash script” -
Save the file by pressing Ctrl+S (or Cmd+S).
Make the post deploy action hook executable
-
In the
Navigatorview, right-click thepost_deployfile and clickProperties. -
In the
Permissionstable, select theExecutecheck boxes for all user types.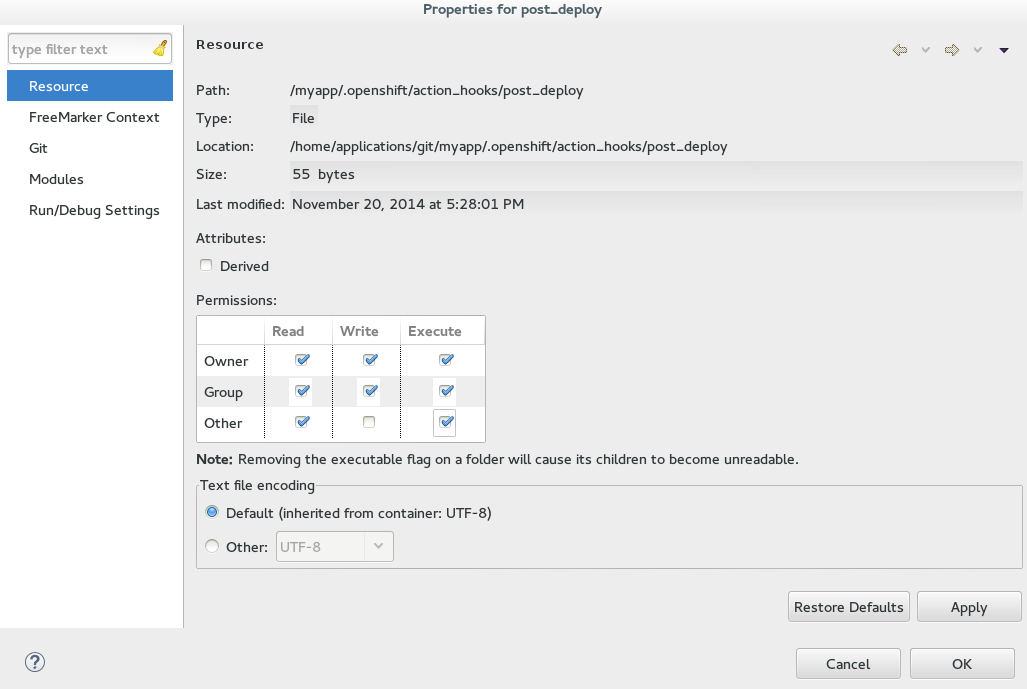 Figure 2. Execute Permissions Check Boxes Selected for All Users
 -
Click
Applyand clickOK.
3. Extend the Git Remote Connection Timeout
As your application source code grows in size, the remote connection from the IDE to the OpenShift Online application Git repository may not remain open long enough for the push process to complete. The default Git remote connection timeout is set to 30 seconds after which the connection is closed. But you can extend the Git timeout through the IDE preferences to ensure that the push process is provided with sufficient time to complete.
To extend the Git remote connection timeout, complete the following steps:
-
Click .
-
In the
Remote connection timeout (seconds)field, type a value in seconds.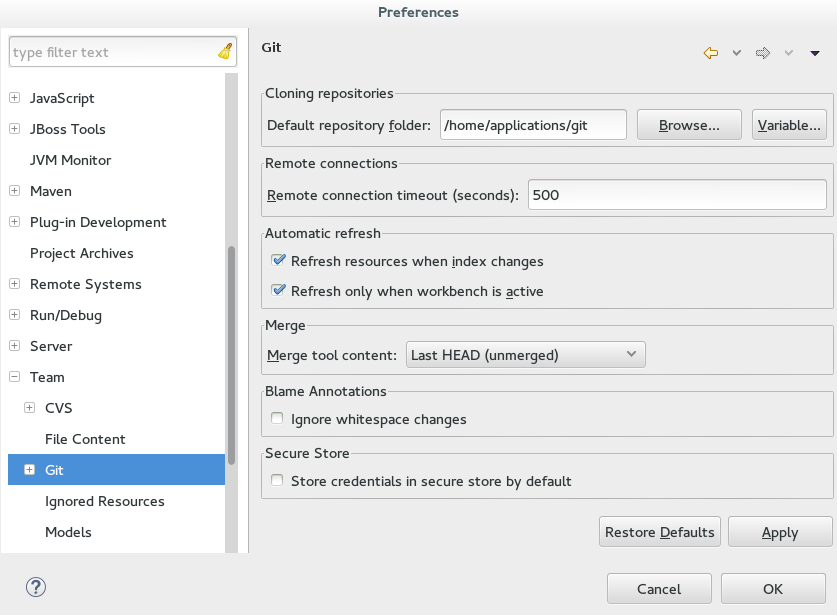 Figure 3. Git Remote Connection Timeout Set
 -
Click
Applyand clickOKto close thePreferenceswindow.
4. Republish the Application
Before markers and action hooks take effect on your application building and deployment process you must commit the files and push changes to the OpenShift application repository. OpenShift Tools assists you to perform these Git actions as part of the republishing process.
To republish the application, complete the following steps:
-
In the
Serversview, right-click{application name} at OpenShiftand clickPublish. -
Complete the fields about the application changes to commit and push to the OpenShift Online application repository as follows:
-
In the
Commit messagefield, type the following message:Added hot_deploy marker and post_deploy bash script -
In the
Filestable, ensure thehot_deployfile is selected and select thepost_deployfile.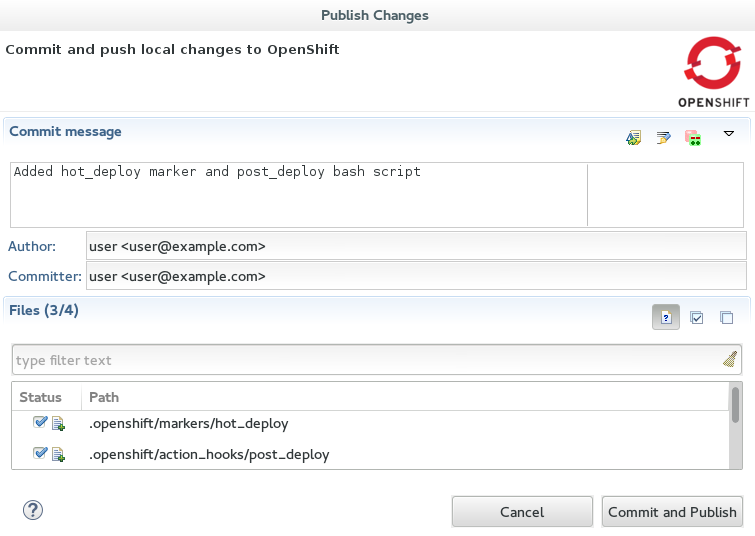 Figure 4. Commit Message Supplied and Files Selected for Committing and Publishing
-
-
Click
Commit and Publish.
The Console view becomes the view in focus showing the application publication progress. A snippet of the output demonstrating the effect of the hot deploy marker and post deploy action hook is shown here for the sample application:
Not stopping cartridge xyz because hot deploy is enabled
Building git ref 'master', commit abc123
...
Activating deployment
Deploying xyz cartridge
Not starting cartridge xyz because hot deploy is enabled
This is my post-deploy bash script
-------------------------
Git Post-Receive Result: success
Activation status: success
Deployment completed with status: success
Note that the server has not been stopped and restarted because hot deploy is enabled and the bash script is run post application deployment as required.
Terminology
-
Git: The revision control system used by OpenShift.
-
Marker: A set-named empty file added in the OpenShift application in the
.openshift/markersdirectory; markers are used to specify configuration to the OpenShift server. -
Action hook: A user-specified script that is added to the OpenShift application, in the
.openshift/action_hooksdirectory; scripts are run by OpenShift at specified stages of the application build and deploy process as denoted by the file name.
Did You Know?
-
You can also access the
Configure Markerswizard from theServerview by right-clicking{application name} at OpenShiftand clicking . -
You can add files to the Git index at any time by right-clicking the file in, for example, the
Navigatorview and clicking . -
You can see more information relating to the application Git repository by opening the
Gitperspective or individual Git views. All of these can be assessed from theWindowmenu.