The IDE includes the Git Perspective to allow developers to create, add, and manage their Git repositories quickly and easily with a graphical interface. This article introduces the basic workflow of a Git project and how to accomplish the most common Git-related tasks via the Git perspective. Common Git-based tasks include:
Set Up the Git Perspective
Use the following instructions to locate the Git Perspective in the IDE:
-
In the menu bar at the top of the page, click .
-
From the list of available perspectives, select
Gitand clickOK.
Result: The Git Repositories view appears on the upper left side of the window.
1. Set up a Repository in the Git Perspective
The first step to using the Git Perspective in the IDE is to set up a Git repository. There are three ways to set up a Git repository in the Git Perspective:
The most common use case for developers is to clone an existing repository, or import an existing local clone of a repository into the IDE. However, the first option is an easy way to create a full repository (bare or normal) from scratch.
Create a New Git Repository
If a repository is not already created and available, use the following steps to create a new repository:
-
Click the
Create a new Git Repository and add it to this viewbutton.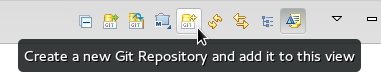 Figure 1. Click the Create a New Git Repository Button
 -
In the dialog box:
-
Ensure that the automatically populated default value for the
Repository Directoryfield is correct. -
Optionally, if required, check the
Create a bare repositoryto create a new bare repository. For details about bare repositories and how they differ from a normal repository, see the Did You Know? section.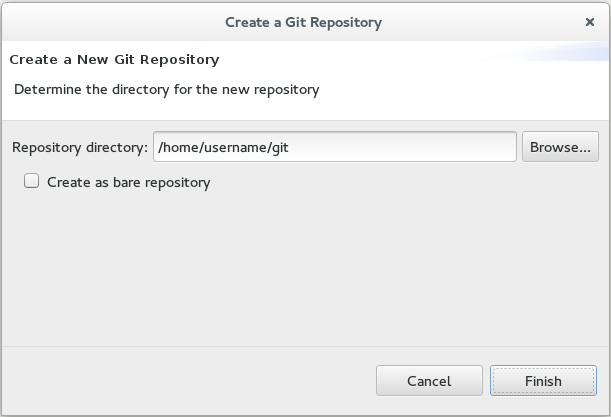 Figure 2. Create a New Git Repository
Result: A new git repository is created on your local machine and is listed in the
Git Repositoriesview.
-
Clone an Existing Git Repository
If your repository already exists online (for example, in GitHub), use the following steps to create a local clone:
-
Ensure that you have forked the repository online. This option is available in the repository host’s website.
-
Click the
Clone a Git Repository and add the clone to this viewbutton.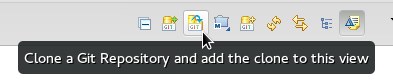 Figure 3. Click the Clone a Git Repository Button
 -
Enter the details of the source repository as follows:
-
Add the
URIfor the repository’s online source. This automatically populates theHostandRepository Pathfields are automatically populated. -
Add your username and password for the source repository under the
Authenticationdetails. -
Click
Nextto continue. Figure 4. Enter the Source Repository Details
-
-
Customize the local version of your Git repository as follows:
-
Confirm that the automatically populated information for the destination
DirectoryandInitial Branchare correctly populated. -
Optionally, set a non-default name for the
Remote namefield. -
Optionally, select the
Add project to working setsoption and use the drop down menu and theSelectbutton to select the appropriate working sets for this repository.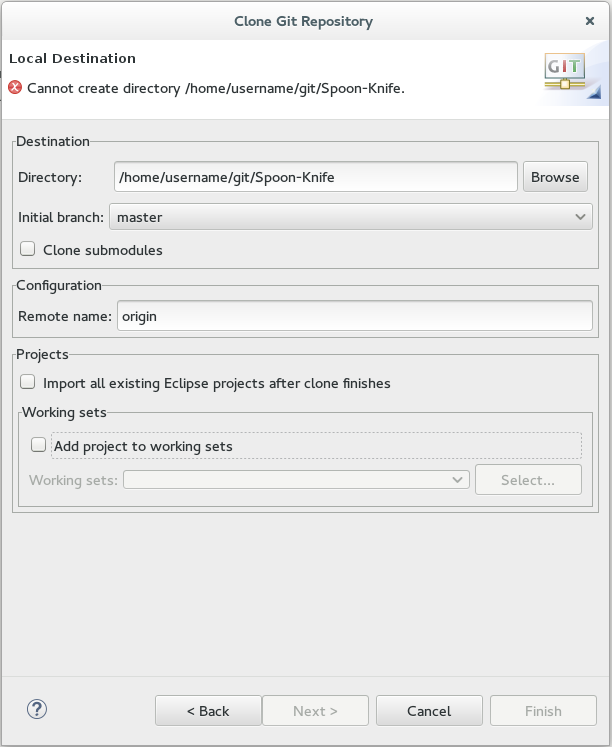 Figure 5. Customize the Local Version of the Git Repository
 -
Click
Finishto conclude cloning an existing Git repository.
-
Result: The new cloned repository is listed in the Git Repositories view.
Add an Existing Local Git Repository
If you have already cloned a Git repository locally, the following instructions are necessary to add your Git repository to the IDE. If you have not yet cloned your repository, follow the instructions in the prerequisites section below:
Prerequisites
-
Ensure that you have forked the repository online.
-
In the command line on your local system, navigate to the location where you want to store the local copy of the repository and enter the following command to clone the repository:
$ git clone ${repo_URL}==== Add an Existing Git Repository Use the following instructions to add your existing local Git Repository to JBoss Developer Studio’s Git Perspective:
-
Click the
Add an existing local Git Repository to this viewbutton.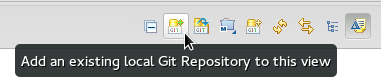 Figure 6. Click the Add an Existing Local Git Repository Button
 -
Select the local Git Repository as follows:
-
Click
Browseto navigate to the local directory that contains the Git repository. -
Optionally, select the
Look for nested repositoriescheckbox to search for nested repositories. -
In the
Search resultsbox, ensure that the appropriate .git file is selected.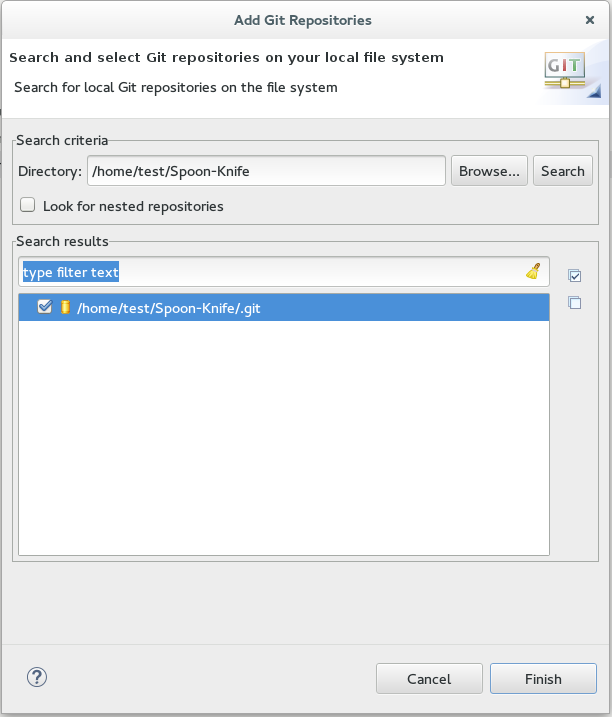 Figure 7. Find and Add Local Repository
 -
Click
Finish.
-
Result: The local repository now appears in the Git Repositories view.
Add a Remote for the Repository
After setting up your repository for the first time, set up a remote for repository. This is a one-time set up step for newly created or added repository.
-
In the
Git Repositoriesview, expand the target repository. -
From the expanded options, right-click
Remotesand thenCreate Remotes. -
In the
New Remotedialog box:-
Add a name in the
Remote namefield. -
Ensure that the
Configure Pushradio button is selected. -
Click
OKto continue.
-
-
In the
Configure Pushdialog box:-
Click
Changeto view theSelect a URIdialog box. -
Add the URI to your repository in the
URIfield. This automatically populates theHostandRepository pathfields. -
Add your repository username and password in the
Authenticationsection of the dialog box and clickFinishto continue.
-
-
Click
Saveto save your push configuration settings.
Result: Expand the Remotes folder in the repository view to see the newly added remote.
2. Create and Work With a New Branch
This section provides instructions for creating a new branch and common tasks with the new branch, such as:
Creating a New Branch
If your repository is already set up in the IDE, create a new branch to make changes to the files.
-
In the
Git Repositoriesview:-
Expand the name of your Git Repository.
-
Click
Branchesto expand the branch view. -
Click
Remote Trackingto view all remote branches for the repository. -
A branch displays with a name that begins with origin/master. Right-click this branch and select
Create Branchfrom the displayed options.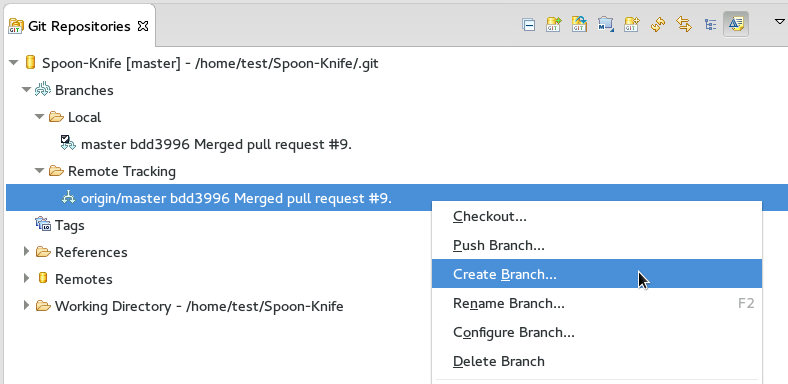 Figure 8. Create a Branch from Origin/Master
-
-
Add the required details about the new branch:
-
Add the desired new branch name in the
Branch namefield. -
Ensure that the
Configure upstream for push and pullcheckbox is selected. -
In the
When doing a pulloptions, select the option that suits your requirement. TheMerge upstream commits into local branchoption creates commits when a merge occurs. These commits are included in the subsequent pull request. TheRebase commits of a local branch onto upstreamoption performs a rebase before adding your changes, which prevents additional commits in your pull request. -
Ensure that the
Checkout new branchcheckbox is selected.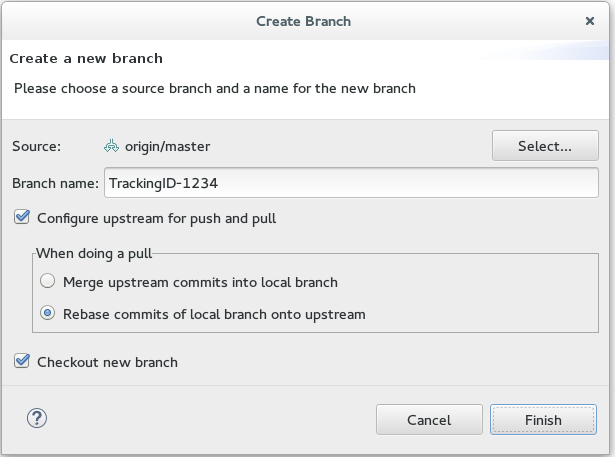 Figure 9. Add Details for a New Branch
 -
Click
Finishto create the new branch.
-
Result: The new branch appears under .
Working in the New Branch
After creating a new branch, you can implement changes in the new branch as follows:
-
Expand and find the new branch where changes are to be implemented.
-
Confirm that the target branch is checked out. The currently checked-out branch displays a small black check mark:
 Figure 10. An Example of a Checked-out Branch
 -
Right-click on the checked-out branch name and mouse-over the
Show Inoption in the menu and then clickTerminalin the submenu.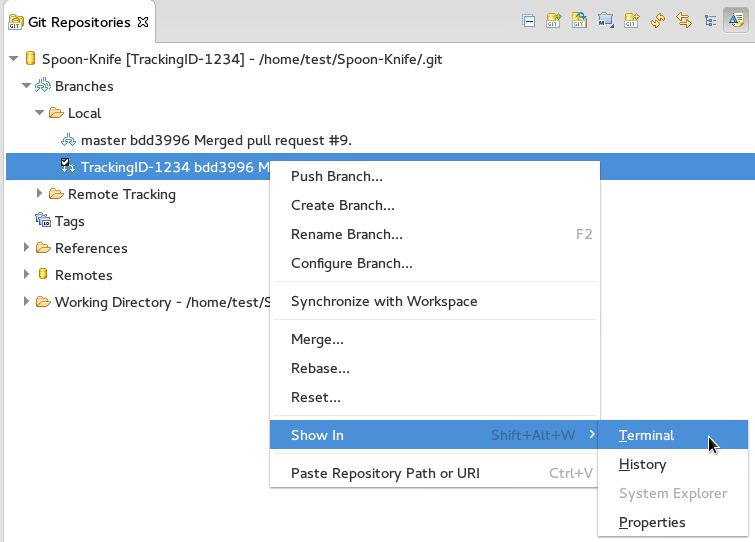 Figure 11. The Show Branch in Terminal Option
 -
On the right view, a
Terminaltab appears. In the same row, click the icon that resembles a computer monitor to view the command line prompt in this view. Figure 12. The Open a Terminal Button
 -
In the
Launch Terminaldialog box:-
Ensure that Local Terminal is selected in the
Choose a Terminaldrop-down box. -
Select Default (ISO-8859-1) in the
Encodingbox. -
Click
OK. Note that as a default, the terminal window is at the /home/YourCurrentUser/ directory.
-
Result: The Terminal tab now displays a command line terminal. Use the terminal view to make the required changes to your checked-out files.
Updating the Branch Before Implementing Changes
When working locally on a branch, it is better to ensure the local branch is up to date before creating a pull request (PR). As an example, if someone else has checked out the same repository and created a new branch, made changes, and merged the changes, use the following procedure to update your repository and branch before committing your own changes.
In the example below, a new branch called TrackingID-1234 is created using the IDE. Assuming that someone else is working on the same repository and has created a new branch called NEWBRANCH, made changes to it, and then merged the changes back into the repository. The local branch (TrackingID-1234) is now out of date because it does not include the changes from NEWBRANCH. Use the following instructions to update the branch:
-
Right-click the name of the repository to update.
-
From the menu that displays, click
Pull. -
A status menu appears that displays the progress of the pull request.
-
When the pull completes, a
Pull Result for Repository_Namemenu appears that lists the results of the fetch and update operations. -
Click
OKto conclude the operation.
Result: The repository now contains the most updated version of the contents.
4. Commiting and Merging Changes
After all required changes are complete, commit the changes and then create a Pull Request. Pull Requests are then evaluated by the repository owner and either merged into the repository or rejected.
-
Ensure that the black and white tick mark that indicates the current branch appears at the correct working branch in the
Localfolder of your repository view. -
Right-click the name of the repository. In the displayed menu, click the
Commitoption. -
In the
Commit Changesdialog box:-
Add a commit message describing the changes in the
Commit messagetext box. -
Confirm that the automatically populated
AuthorandCommitterfields contain the correct name and email address. -
In the
Filesarea, all files added using the git add command display in the box. Select the checkbox next to each file to include it in the commit. See the Did You Know? section to learn about only including some of the changed files in a commit.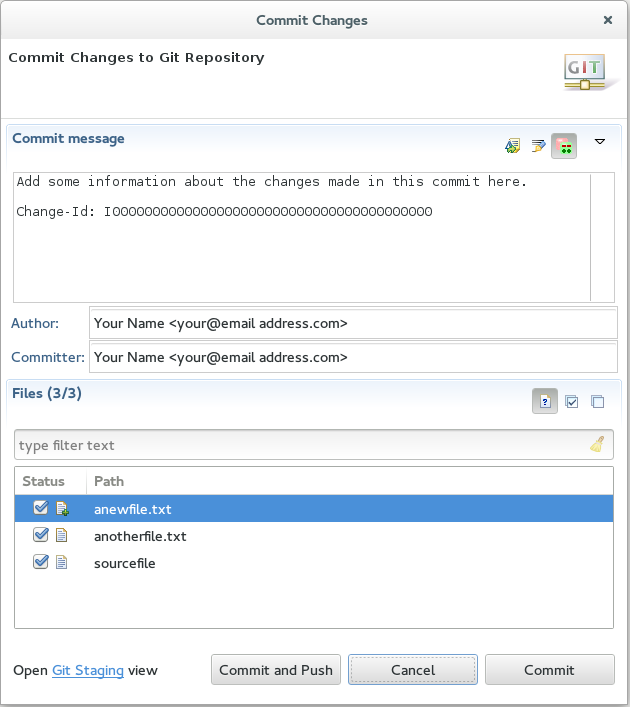 Figure 13. Add details to the Commit Changes Dialog Box
 -
Click
Committo create a new commit (without creating a Pull Request) or clickCommit and Pushto commit the changes and create a Pull Request at the same time.
-
Committing Without Pushing the Changes
If you selected Commit in the previous procedure to commit changes but not push them, use the following instructions:
-
When the operation completes, the repository is now ahead by one commit. This is represented with an arrow and the number one, as seen in the screenshot:
 Figure 14. Git Repository Status
 -
When you are ready to create a Pull Request, right click the current branch name and click
Push Branch. -
An automatically populated
Push Branch Branch_Namedialog box appears. Confirm that the settings are correct. The settings selected when creating this branch are used for this step. ClickNextto continue. -
A dialog box appears requesting the repository access username and password.
-
A
Push Confirmationdialog box appears. ClickFinishto create the Pull Request. If requested, supply the username and password for the repository once again. -
When the operation completes, a
Push summarydialog box appears. ClickOKto dismiss this dialog box.
Result: The included changes are now committed and a Pull Request is generated for the repository owner to review.
Committing and Pushing the Changes
If you selected Commit and Push in the previous procedure, use the following instructions:
-
A dialog box appears requesting the repository access username and password.
-
When the operation completes, the repository is now ahead by one commit. This is represented with an arrow and the number one, as seen in the screenshot:
Figure 15. Git Repository Status -
After the Pull Request is evaluated and merged, right-click the repository and click
Pullto manually update the repository.
Result: A Pull Request is generating and ready for the repository owner to review.
Did You Know?
-
Bare repositories are recommended for central repositories, but not for development environments. Bare repositories differ from normal repositories because they do not contain a working or checked out copy of any source files. This prevents editing files and committing changes in the repository. Additionally, they store the git revision history for your repository in the repository’s root folder instead of in a .git sub-folder.
-
When selecting the files to commit in the
Commit Changes, you can select only the files you want included in the commit using the checkboxes next to each file name. The unchecked files are not included in the commit and no extra actions are required to reconcile the uncommitted files when committing and creating a Pull Request. -
If you need to add a change ID to each commit message, in the
Comming Changesdialog box, click the rightmost icon at the top right corner to add a change ID to the commit message.