What's New in 4.9.0.Final
Forge Tools
Forge Runtime updated to 3.9.1.Final
The included Forge runtime is now 3.9.1.Final. Read the official announcement here.
Fuse Tooling
REST Viewer becoming an editor
Previously, there was a REST editor which was read-only. It is useful to have a great overview of already defined Camel REST DSL definitions. Now the editor and its related properties tab are also providing editing capabilities allowing to develop faster.
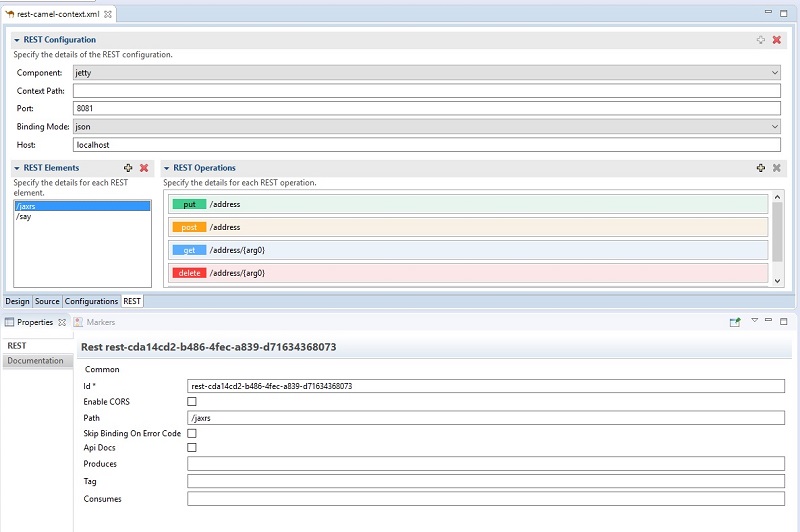
You can now:
-
Create and delete REST Configurations
-
Create and delete new REST Elements
-
Create and delete new REST Operations
-
Edit properties for a selected REST Element in the Properties view
-
Edit properties for a selected REST Operation in the Properties view
In addition, we’ve improved the look and feel by fixing the scrolling capabilities of the REST Element and REST Operations lists.
Hibernate Tools
Hibernate Runtime Provider Updates
OpenShift
Inner loop for Spring Boot applications
Although Spring Boot applications were already supported by the OpenShift server adapter, the global developer experience has been enhanced. Let’s complete the full workflow.
Bootstrapping your Spring Boot applications
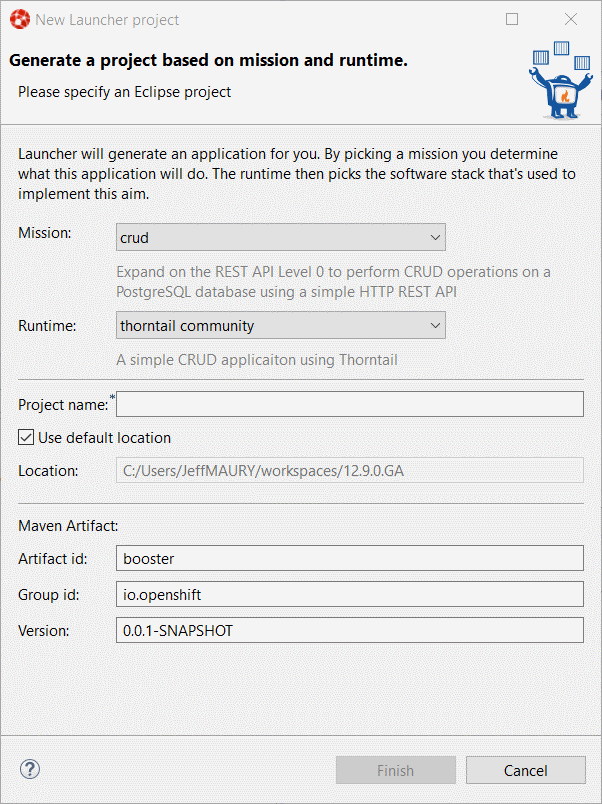
A new generator (wizard) has been added to JBoss Tools. It’s called the Launcher application as it’s based on the fabric8-launcher project. When you launch JBoss Tools, you should see this in Red Hat Central:

Click on the Launcher application
Switch the Missionrest-http Runtimespring-boot current-community
Then set the Project namemyfirstrestapp
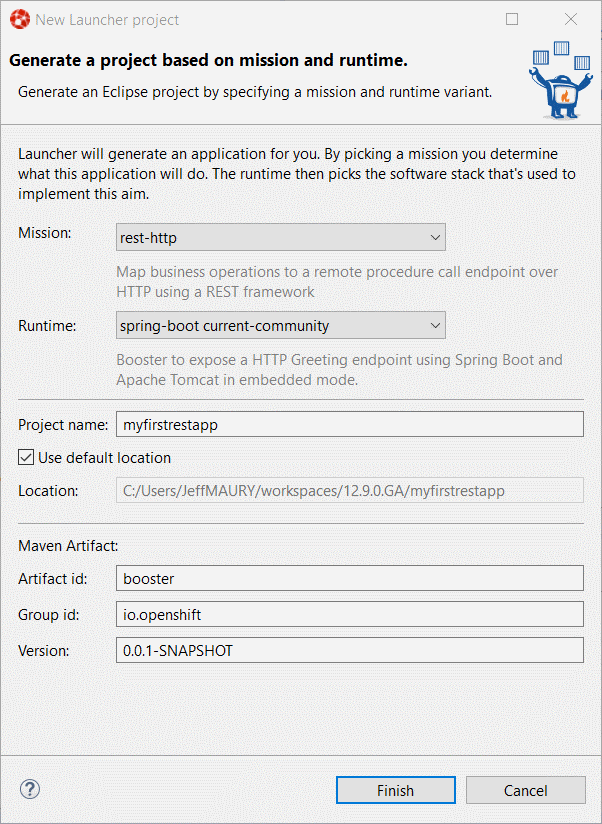
Click the Finish
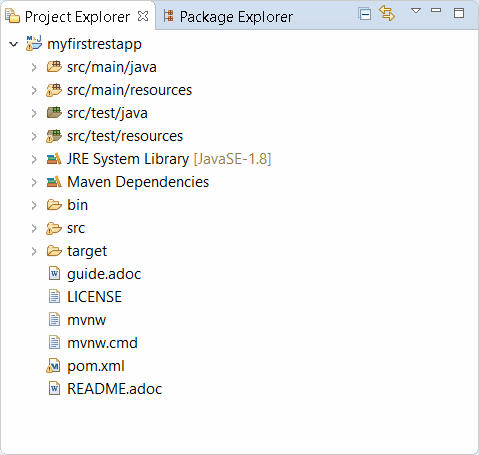
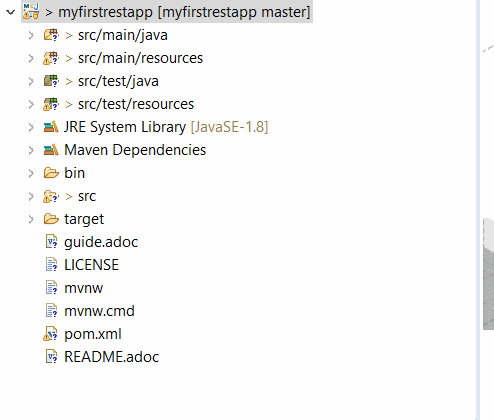
When the project is build and if you expand the myfirstrestappProject explorer
Storing your source code on GitHub
As OpenShift builder images retrieves code on a Git repository, we first need to push
the just generated application code to GitHub. The following section assumes that you
created a repository called myfirstrestapp
We will first create a local Git repository for our application code then push it to GitHub.
Select the myfirstrestappTeam → Share project…
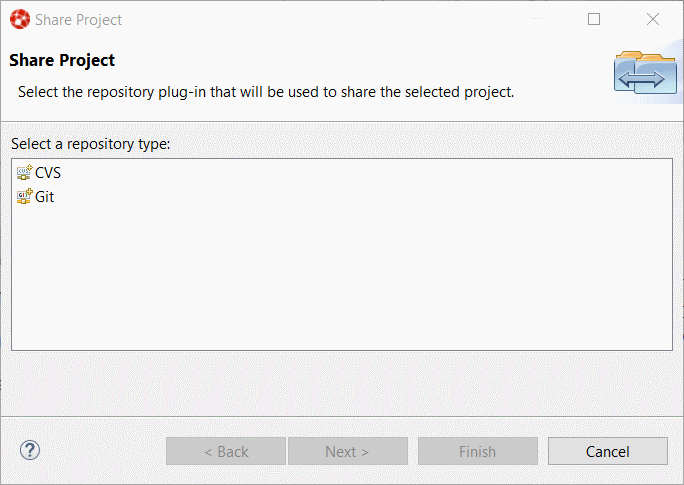
Then select the GitNext
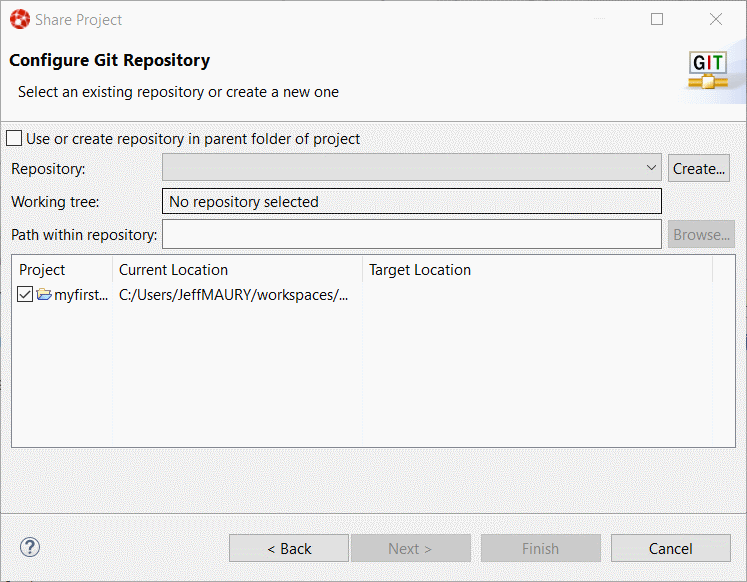
Select the Use or create repository in parent folder of projectmyfirstrestapp
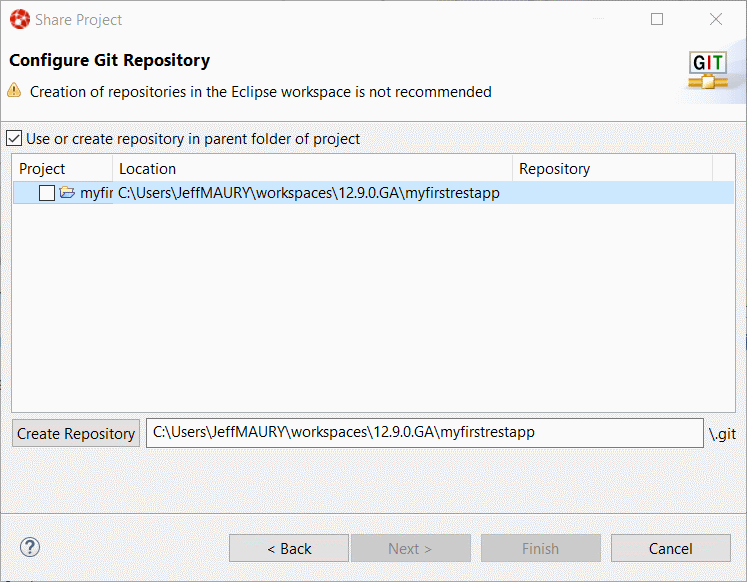
Click on the Create repositoryFinish
The Project explorer
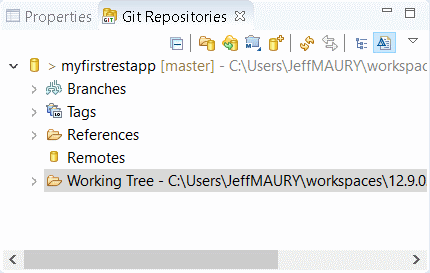
Select the myfirstrestappTeam → Show in Repositories ViewGit Repositories
Inside this view, select the RemotesCreate Remote…
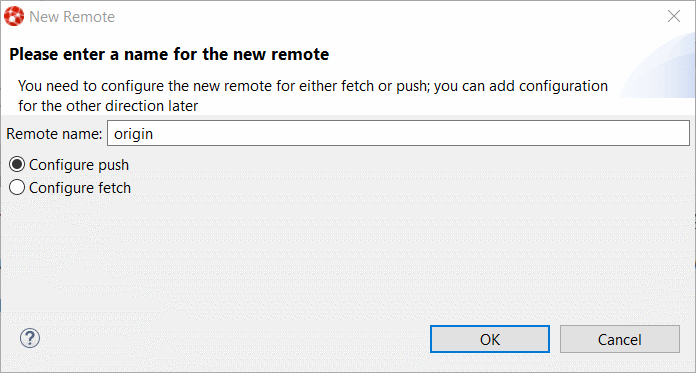
Click on the OK
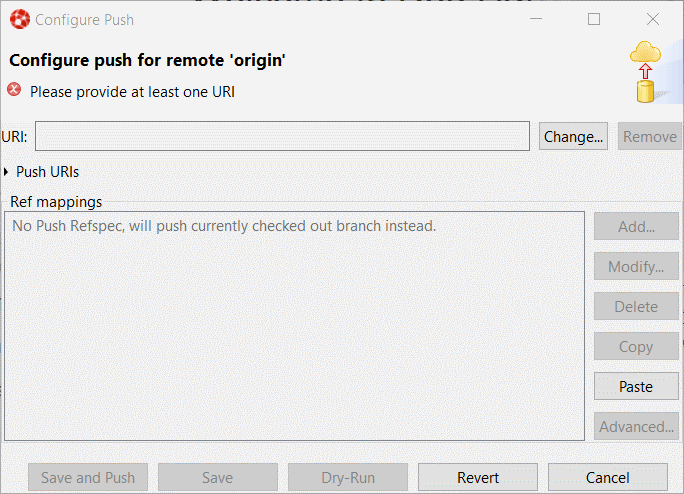
Click on the Change…git@github.com:GITHUB_USER/myfirstrestappURIGITHUB_USER
Then click the FinishSave
Pushing code to GitHub
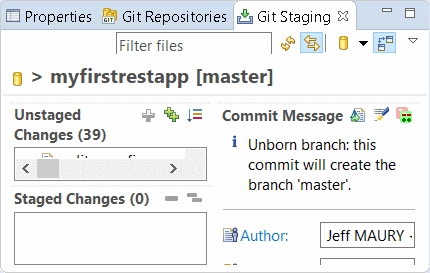
We are now ready to push our application code to GitHub. Select the myfirstrestappProject explorerTeam → CommitGit Staging
Double click on the view title to maximize it:
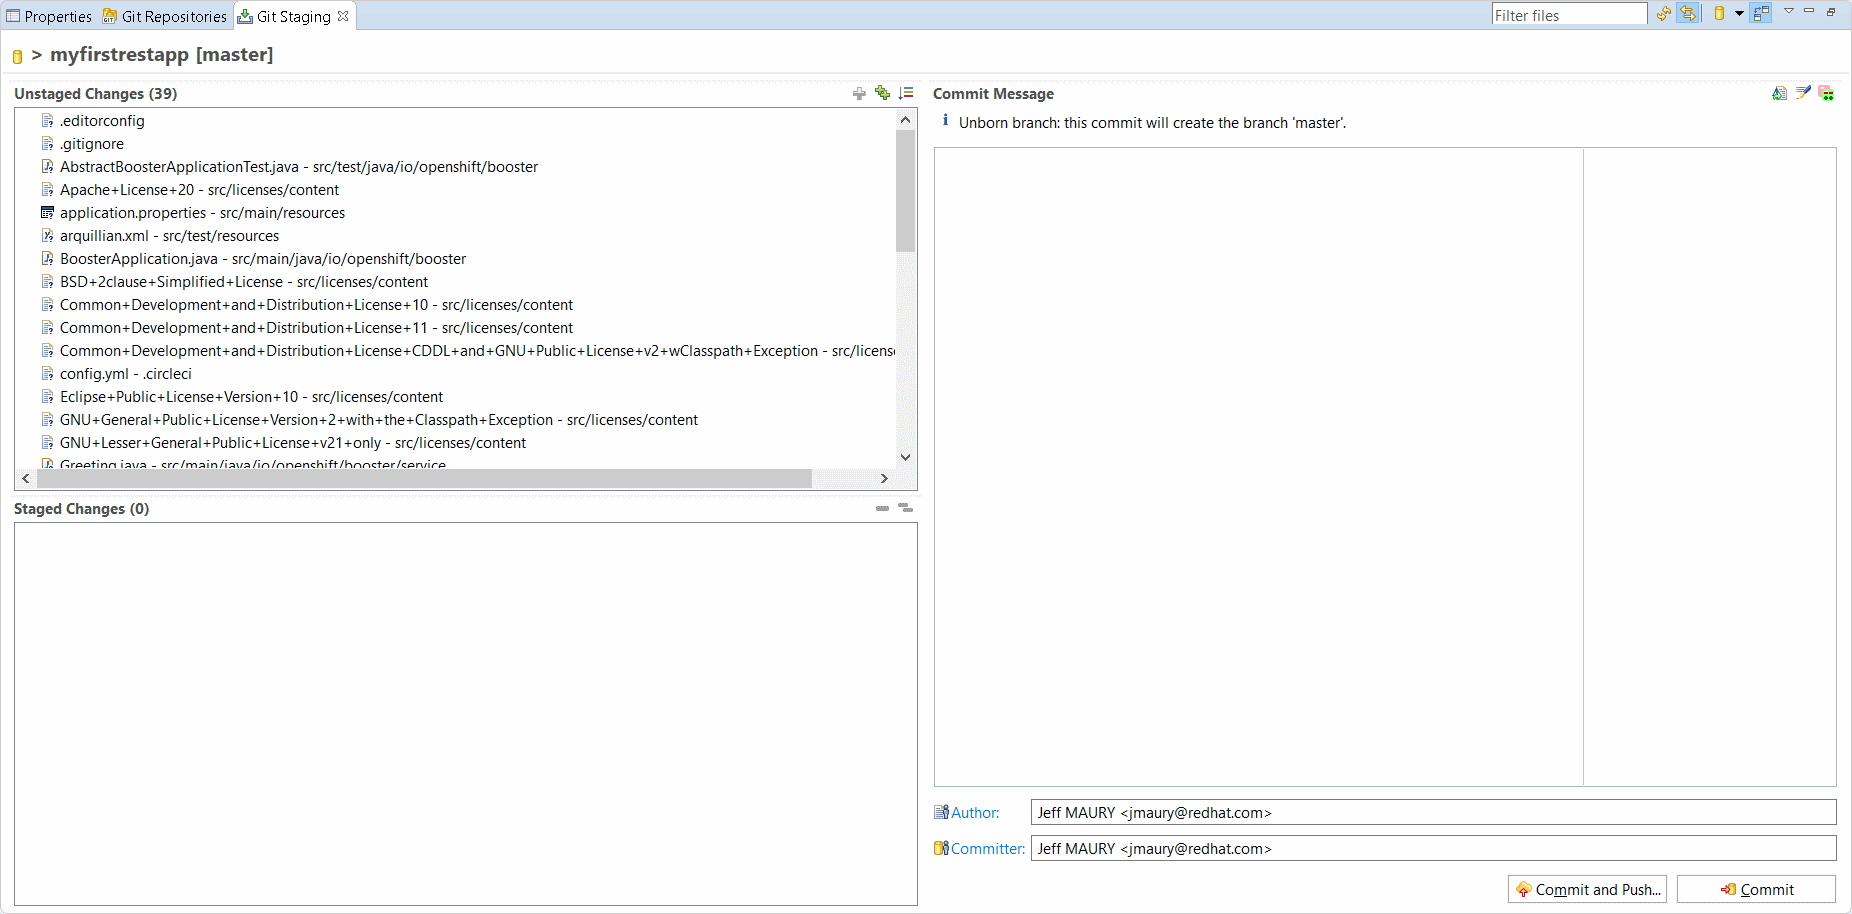
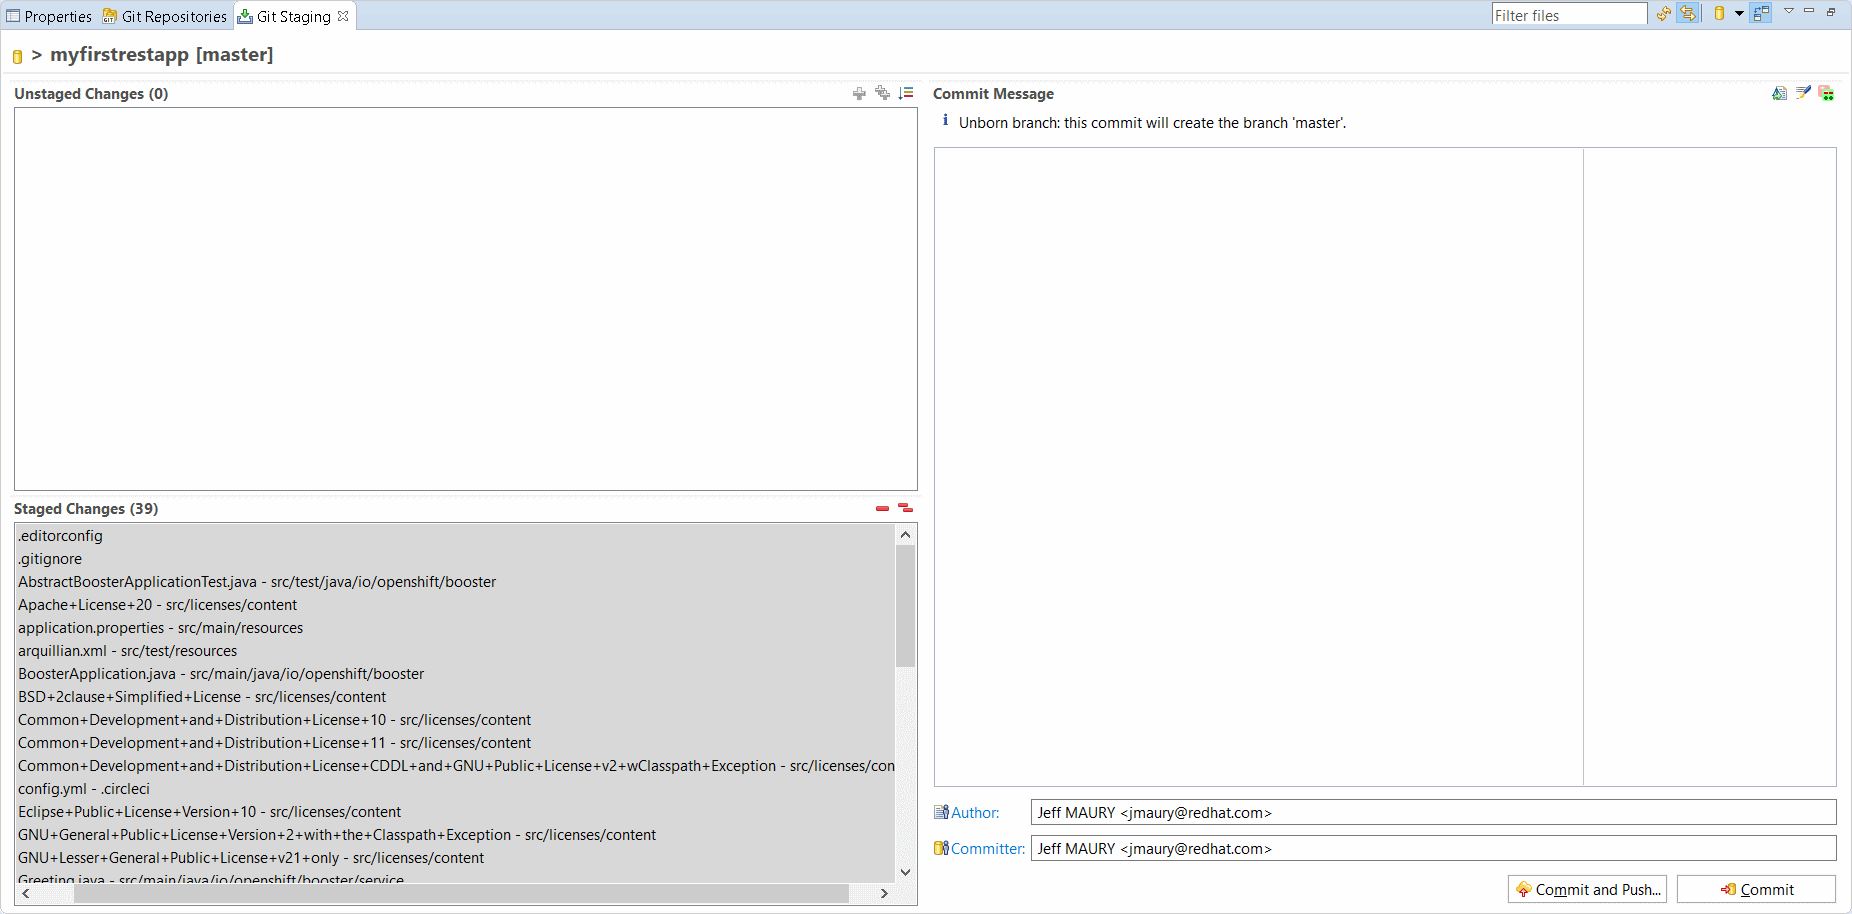
Select all the files listed in the Unstaged changesStaged Changes
Enter a commit message (ex 'Initial version') and click the Commit and Push…
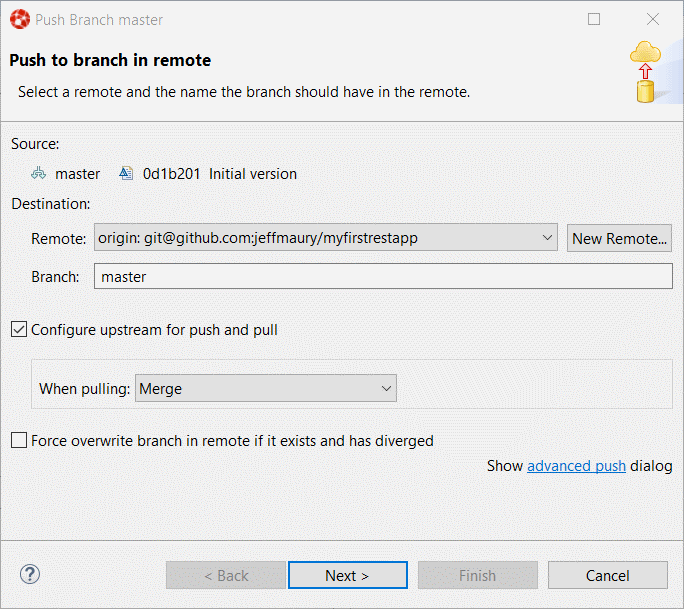
Click on the Next
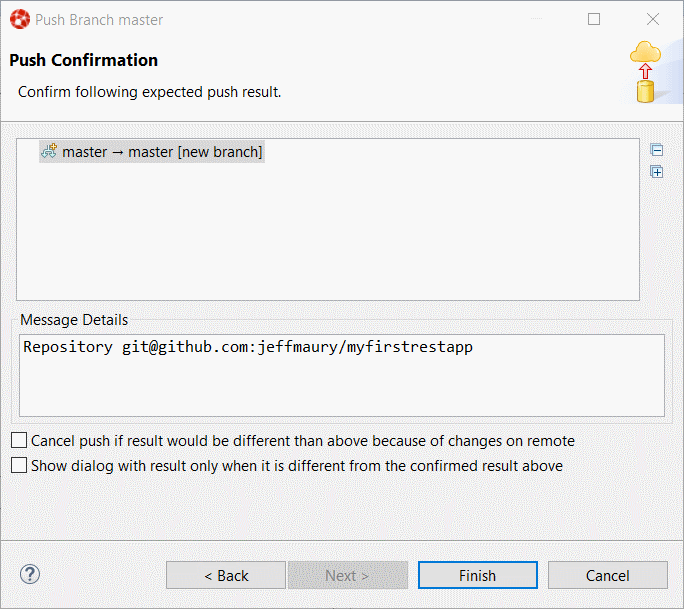
Click on the Finish
A dialog with the result of the push operation will be displayed. Click the OK
Add Spring Boot Devtools to the packaged application
In order to support live update on an OpenShift cluster, we must add Spring Boot DevTools to our Spring Boot application.
Open the pom.xmlmyfirstrestappspring-boot-maven-plugin
            <configuration>
              <excludeDevtools>false</excludeDevtools>
            </configuration>
The whole spring-boot-maven-plugin
      <plugin>
        <groupId>org.springframework.boot</groupId>
        <artifactId>spring-boot-maven-plugin</artifactId>
        <executions>
          <execution>
            <goals>
              <goal>repackage</goal>
            </goals>
            <configuration>
              <excludeDevtools>false</excludeDevtools>
            </configuration>
          </execution>
        </executions>
      </plugin>
Close and save the pom.xml
Push the change to GitHub: select the Team → Commit…
Deploy the application on OpenShift
Before we can deploy the application on OpenShift, we must first create an ImageStream on our OpenShift cluster. The reason is that the Spring Boot support relies on S2I builds that will explode the Spring Boot uber JAR when Spring Boot DevTools is present. As this is not supported by all Java based S2I images, we will use one that supports it, ie fabric8/s2i-java:2.2
First, in the myfirstrestappspringboot.json
{
    "apiVersion": "image.openshift.io/v1",
    "kind": "ImageStream",
	"metadata": {
		"name": "springboot"
	},
    "spec": {
        "lookupPolicy": {
            "local": false
        },
        "tags": [
            {
                "annotations": {
					"tags": "builder,java"
				},
                "from": {
                    "kind": "DockerImage",
                    "name": "registry.access.redhat.com/fuse7/fuse-java-openshift:1.1"
                },
                "importPolicy": {},
                "name": "1.1",
                "referencePolicy": {
                    "type": "Source"
                }
            }
        ]
    }
}
Then, from the OpenShift explorer view, select the OpenShift connection for your cluster (if you don’t have
one already defined, you must define it), right click on the New → Resource…
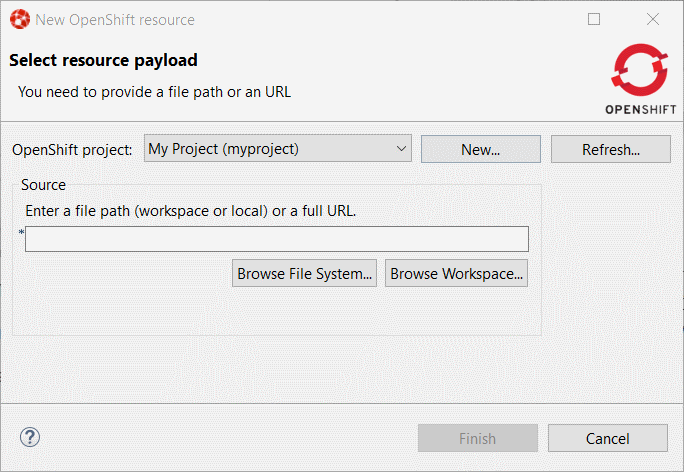
You can select the OpenShift project you want to work with and then click on
the Browse Workspace…springboot.jsonmyfirstrestapp
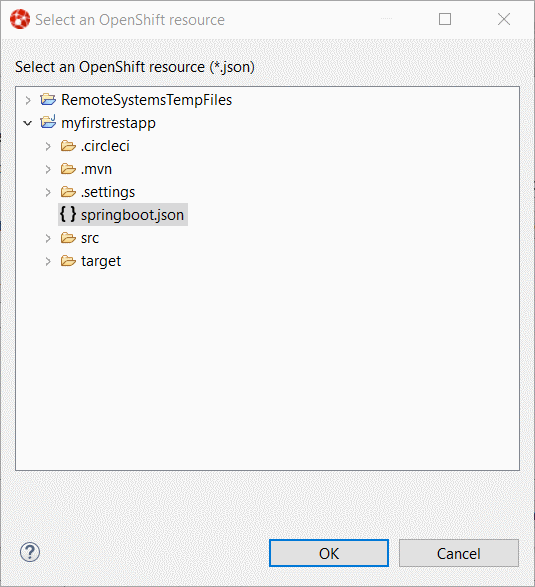
Click the OKFinish
Create the application on OpenShift
We’re now ready to create the application on the OpenShift cluster. Select the OpenShift
connection, right click the New → Application…springboot
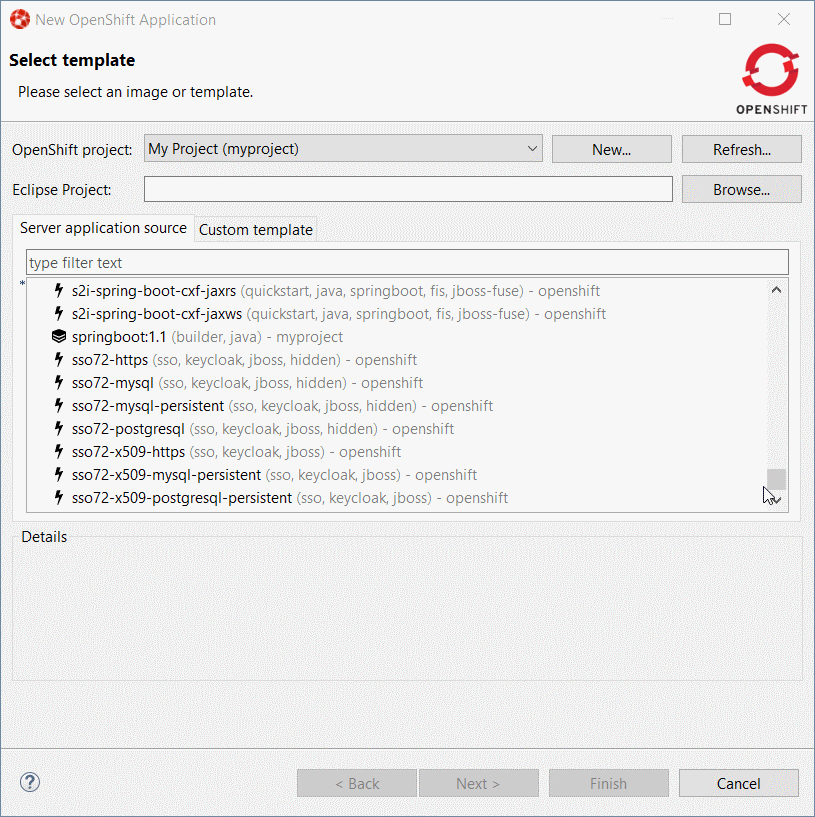
Select this ImageStream and click the Next

Enter `myfirstrestapp`Name
field, `https://github.com/GITHUB_USER/myfirstrestapp in the Git Repository URL
field, replacing GITHUB_USER by your real GitHub user name and click
the Next`` button.
On the Deployment Configuration & Scalability`Next
On the Service & Routing Settings8778-tcpEdit
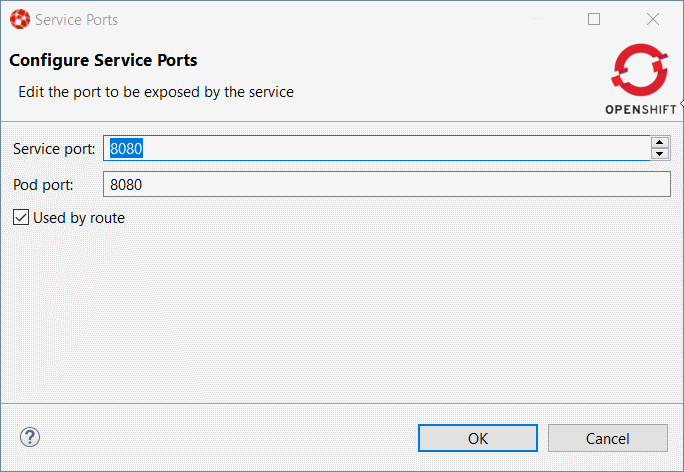
Click the OKFinish
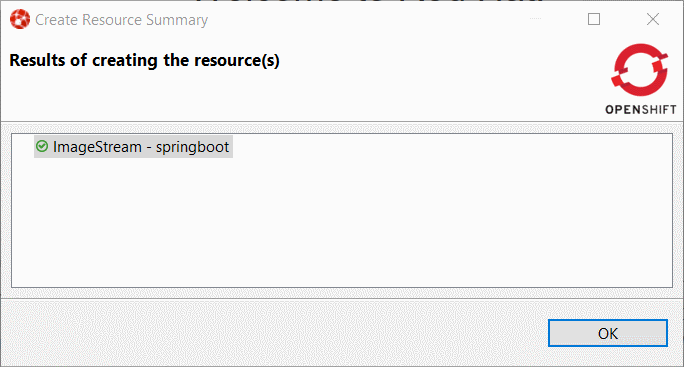
The list of OpenShift resources created will be displayed by a dialog:
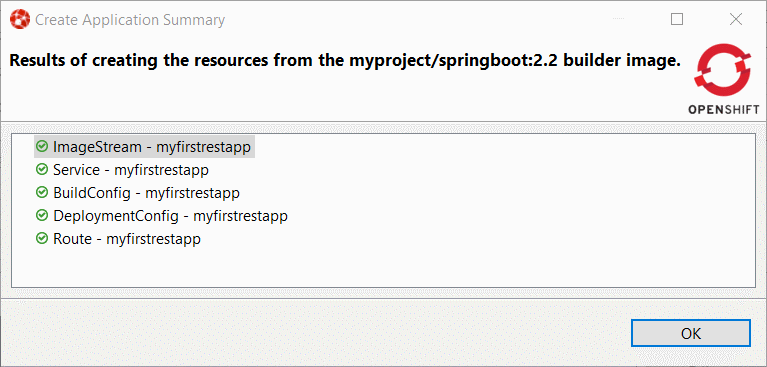
Click the OKCancel
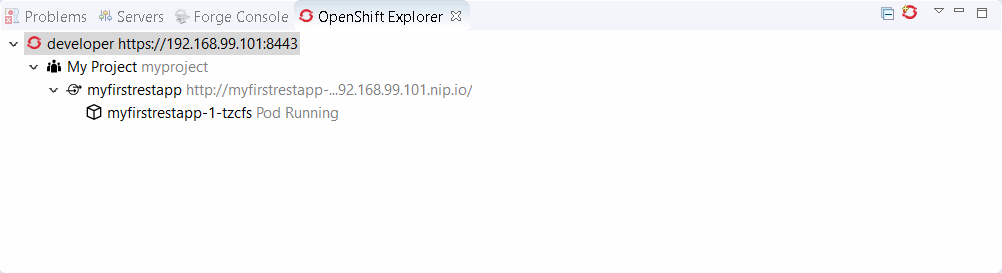
After the build is run (this may takes several minutes as the Maven build will download lots of dependencies), you should see a running pod:
Inner loop setup
We are going to synchronize the local Eclipse project with the remote OpenShift pod. Each time a file will be modified locally, then the pod will be updated accordingly.
Select the running pod in the OpenShift explorerServer Adapter…
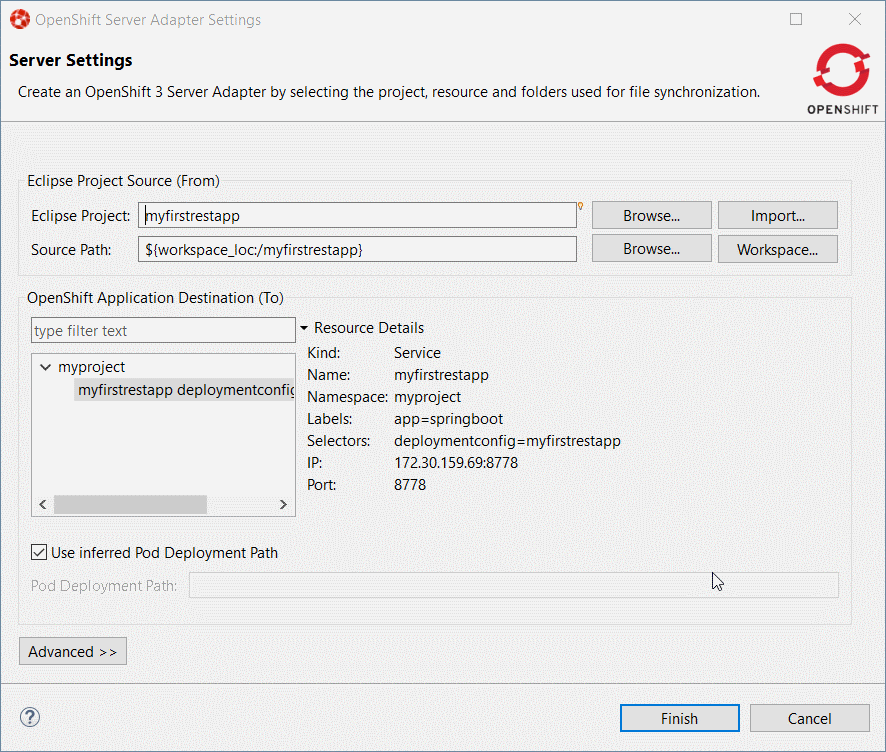
Click the OKServers
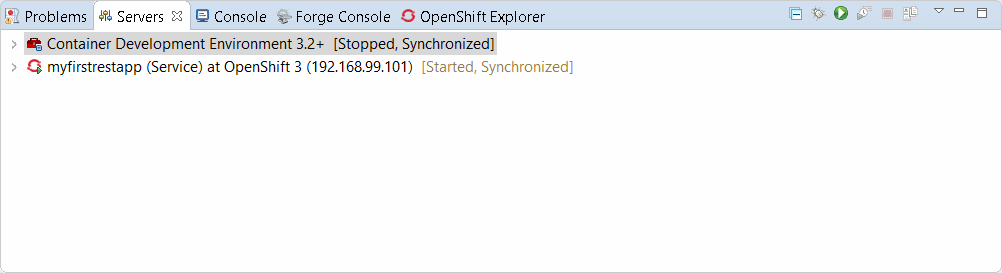
We’ve not setup the synchronization between our local Eclipse project and the remote OpenShift project. Each modification done locally will be reported on the remote OpenShift cluster.
Let’s modify our local application code and see the changes applied almost instantly:
Edit the file src/main/java/io/openshift/booster/service/Greeting.javamyfirstrestappFORMATHello, %s!Hello, Mr %s!
The file should be now:
/*
 * Copyright 2016-2017 Red Hat, Inc, and individual contributors.
 *
 * Licensed under the Apache License, Version 2.0 (the "License");
 * you may not use this file except in compliance with the License.
 * You may obtain a copy of the License at
 *
 * http://www.apache.org/licenses/LICENSE-2.0
 *
 * Unless required by applicable law or agreed to in writing, software
 * distributed under the License is distributed on an "AS IS" BASIS,
 * WITHOUT WARRANTIES OR CONDITIONS OF ANY KIND, either express or implied.
 * See the License for the specific language governing permissions and
 * limitations under the License.
 */
package io.openshift.booster.service;

// tag::snippet-greeting[]
public class Greeting {

    public static final String FORMAT = "Hello, Mr %s!";

    private final String content;

    public Greeting() {
        this.content = null;
    }

    public Greeting(String content) {
        this.content = content;
    }

    public String getContent() {
        return content;
    }
}
// end::snippet-greeting[]
Then, in the ÒpenShift explorer` view, select the myfirstrestapp`Show In → Web BrowserInvoke
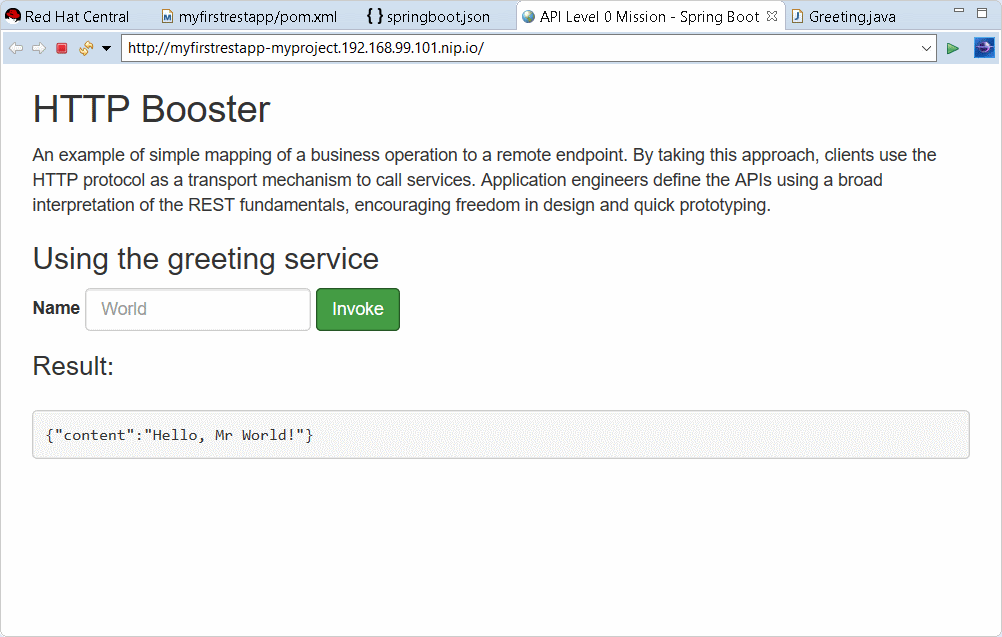
You’ve just experienced the inner loop on your Spring Boot application: any change done locally is reported and testable almost immedialtely on your OpenShift cluster.
You can restart the deployment in debug mode and you’ll be able to remote debug your Spring Boot application. Amazing, no ?
Related JIRA: JBIDE-26162
Server Tools
Wildfly 14 Server Adapter
A server adapter has been added to work with Wildfly 14. It adds support for Java EE 8.
Related JIRA: JBIDE-26335