What's New in 4.1.0.Beta2
BrowserSim
JVM selection and 64-bit Eclipse support on Windows
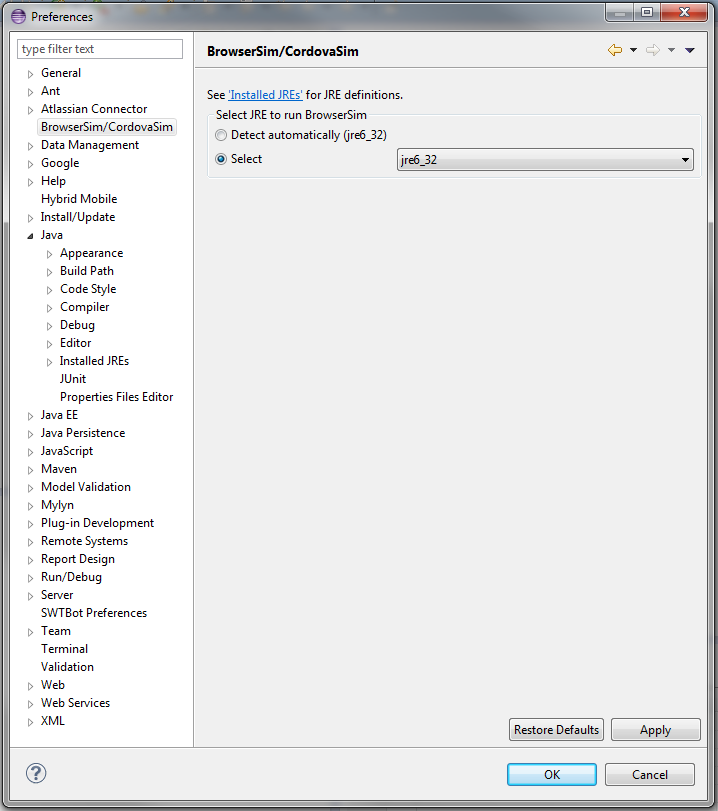
Now you can specify which JVM is used to launch BrowserSim/CordovaSim. This allows to run BrowserSim/CordovaSim from 64-bit Eclipse on Windows. To specify JVM go to Window > Preferences > BrowserSim/CordovaSim and choose a suitable JVM (32-bit JRE/JDK 6 or JDK 7 (but not JRE 7) on Windows):
Related JIRA: JBIDE-13988
Forge Tools
Forge 1 Eclipse-style Wizards
The usability of these wizards has been improved a lot.
The wizards are now in the 'JBoss Tools→Forge' category and have an icon.

When using the 'Entities From Tables' wizard, there is now a way to create a project should you not have one available yet. Clicking the 'New…' button next to the project dropdown box opens another wizard to do this work.

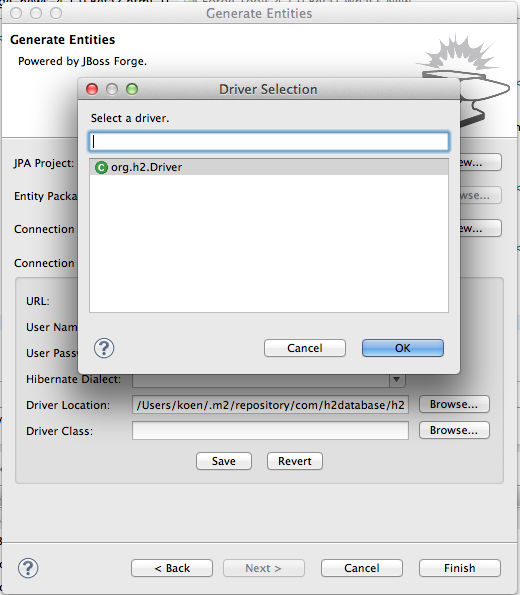
In the 'Entities From Tables' wizard, it is now possible to browse for the driver jar and the driver classes.
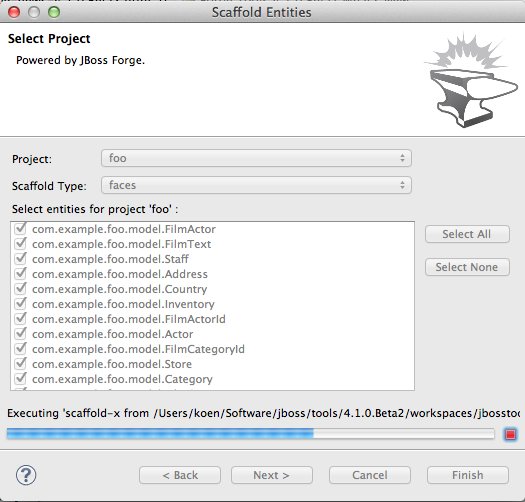
The scaffold wizard now offers the possibility to choose between faces and angularjs. Also the set up step has been removed and the two wizard pages have been merged into one.
There is now also wizard support for generating REST endpoints for entities. It is very similar to the scaffolding wizard.
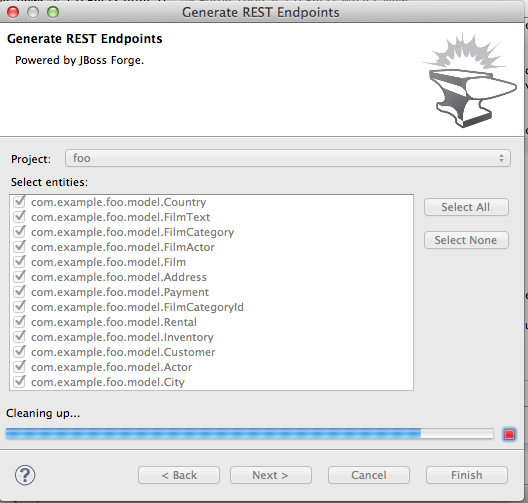
Additionally, as you might have noticed in all of the above screenshots, these wizards now have nice progress bars that indicate what is happening under the covers.
JST / JSF / HTML Editor
jQuery Mobile
jQuery Mobile Palette
A few new HTML5 widget wizards are now available in jQuery Mobile Palette for HTML5 files:

-
Form:

Related JIRA: JBIDE-14463
-
Image:

Related JIRA: JBIDE-14466
-
Video:

Related JIRA: JBIDE-14467
-
Audio:

Related JIRA: JBIDE-14468
-
Label:

Related JIRA: JBIDE-14469
JSF 2.2
JSF 2.2 face-config.xml editor
JBoss Tools XML editor now supports Faces Config 2.2:
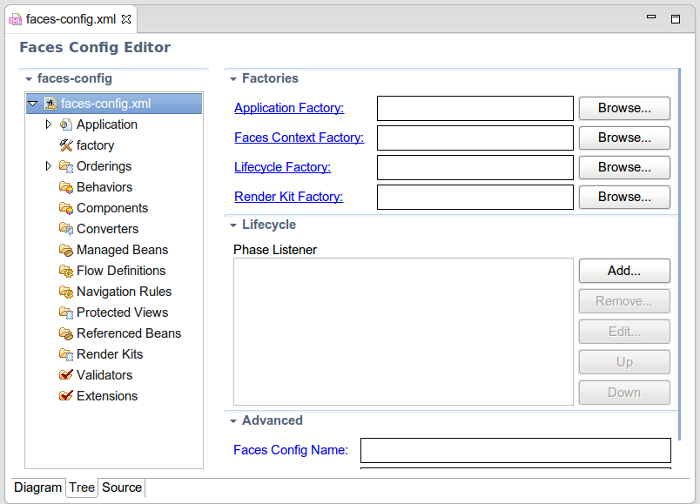
Related JIRA: JBIDE-14439
LiveReload
LiveReload support for JBoss AS and Tomcat Servers
Coming in JBoss Tools 4.1.0.Beta2, LiveReload now also supports 'Server Mode', which brings the same level of features to deployed resources than what was introduced in JBoss Tools 4.1.0.Beta1 for the 'Directory Mode' for workspace resources:
-
A separate proxy is automatically started on a distinct port for each local JBoss AS or Tomcat 6.x/7.x server that is started, or if it was already running when the LiveReload server was started. (Support for OpenShift deployments will come later)
-
Users only need to have a single LiveReload server in their workspace, because each running Application Server will have its own delegated proxy.
-
As with 'Directory Mode', if the 'livereload.js script injection' option is enabled, each returned HTML page will be enriched on-the-fly but the proxy which will inject the <script> tag to load the livereload.js script at the bottom of the <body> element, which removes the need to manually install the LiveReload extension on the browsers.
-
If remote connections are enabled, users can also access their applications deployed on their App Server from external computers or devices such as smartphones or tablets.
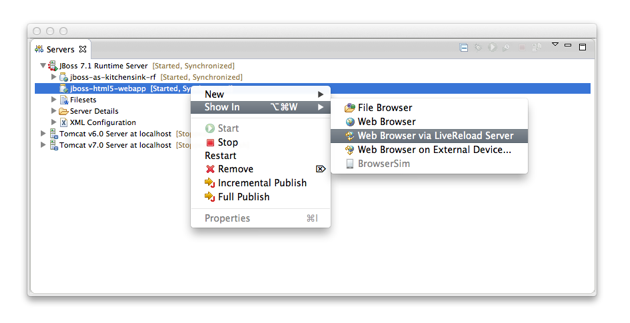
Related JIRAs: JBIDE-14502, JBIDE-13984, JBIDE-14914
QR Code for easy access from external devices
Having the proxy with both 'livereload.js script injection' and 'allow remote connections' options enabled makes a perfect combination to test applications on smartphones and tablets, especially when the LiveReload Browser Extension cannot be installed on such devices.
However, typing the entire URL on such devices is not a good experience. This is why JBoss Tools now provides with a dialog showing a QR Code for such use-cases. Users just need to select the network interface on which they will connect and then scan the generated QR Code with their devices to get access to the resource. The dialog also displays an hyperlink to open the location in the external browser.
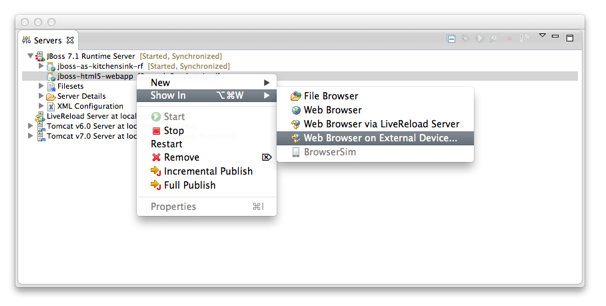
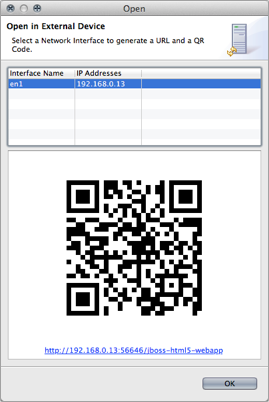
Related JIRA: JBIDE-13984
Simplified Configuration and Usage
Coming in JBoss Tools 4.1.0.Beta2, the proxy option now becomes a permanent feature of the LiveReload server, which means that even workspace resources will be opened with the HTTP protocol instead of the File protocol.
The following use-case have been implemented:
-
If the user has no LiveReload server: the plugin prompts a dialog to create and start a new LiveReload Server with ability to enable script injection (default: on) and remote connections (default: off). If the user clicks on "OK", a LiveReload is created and started, then the browser opens the selected resource (file or deployed application). If user clicks 'Cancel', the dialog closes and nothing happens.
-
If the user already has a LiveReload server but that is not started: a prompt dialog is opened and informs the user that the LiveReload server will be started. the dialog also shows the current options in case the user wants to edit them. If the user clicks on "OK", the LiveReload server is reconfigured and started, then the browser opens the selected resource (file or deployed application). If user clicks 'Cancel', the dialog closes and nothing happens.
-
In case the user already has a LiveReload server that is already started, there is no need to display a dialog. The browser immediately opens the selected resource (file or deployed application).
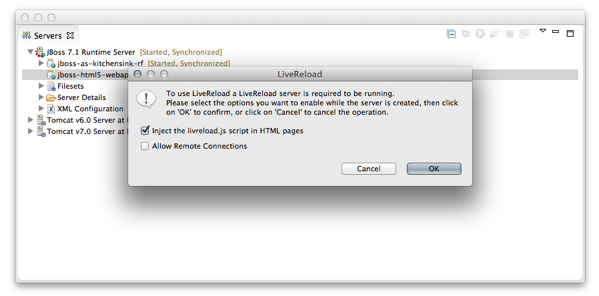
Note: In case where the user wants to display the QRCode to test with a mobile device, script injection and remote connections should be enabled.
Related JIRA: JBIDE-14897
Maven
JBoss Maven Integration
Dependency conversion UI improvement
Non-default scopes and the optional attribute are now shown when converting a project to maven. It is on the dependency identification page where it is directly displayed in the "Maven Dependency" column.
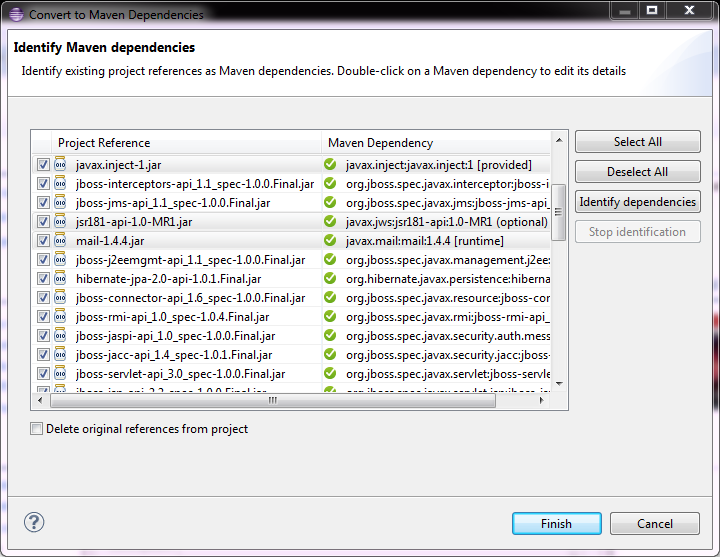
Related JIRA: JBIDE-14811
OpenShift
Application Wizard
Use your own Source Template
OpenShift online now allow you to start an application with your very own git repository for the intial applicaiton. OpenShift tools now allow you to specify a github url in the wizard under "Advanced" and OpenShift will clone it to your application git repository and use it instead of the default template.
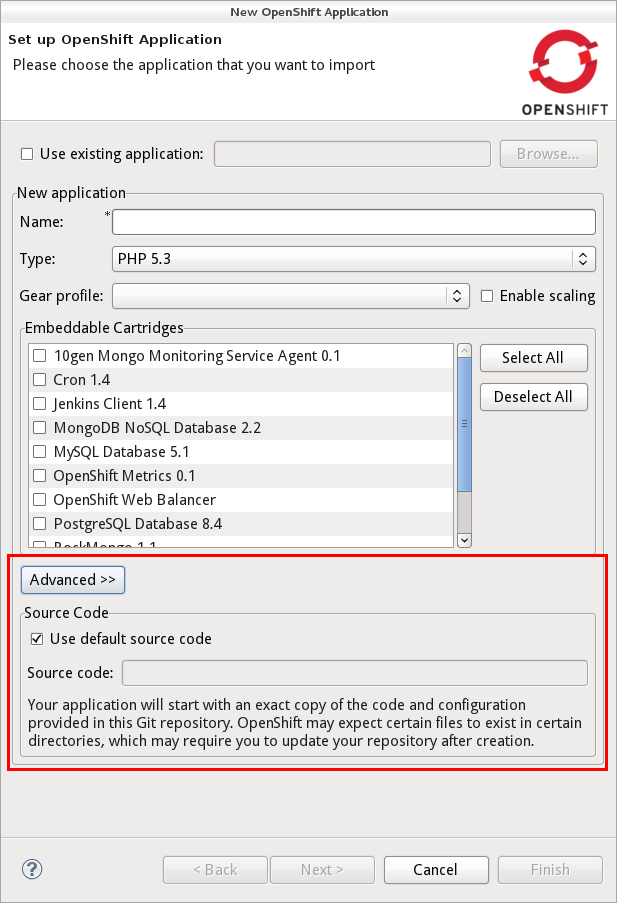
Related JIRA: JBIDE-14588
Disable automatic Maven Build
When pushing a maven project to OpenShift, OpenShift will build the source in the git repository that you pushed. This is very useful when you push source code but it’s not when you push an application that you have already built as an jar,war or ear. If you rather would publish this artifact directly you no longer need the automatic builds but just need the artifact put into the deployments folder. We therefore allow you to tell the application wizard not to trigger the maven build on OpenShift when pushing. If you check this option the wizard will create a marker that gets pushed along with your war and code and tells OpenShift not to launch the maven build.
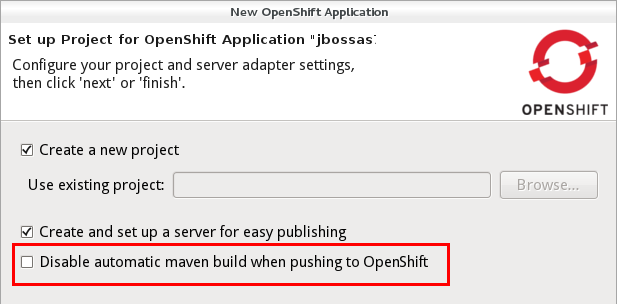
You can enable the Maven builds again by manually changing the marker files or use the Configure > Configure Marker… menu.
Related JIRA: JBIDE-13882
Cartridge Command Line Names
We added the cartridge id in parenthesis nex to the human understandable cartridge names so that you also have the identifier that you would use on the rhc command line.
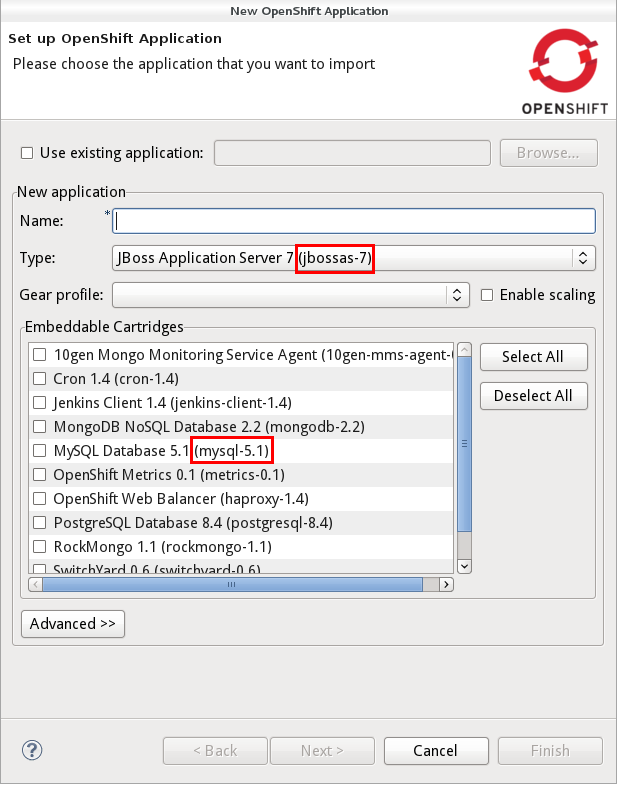
Related JIRA: JBIDE-14631
Jenkins URL and Credentials
When you create an application there are cases where OpenShift will give you additional information about your new cartridge. For example when you create a jenkins instance on OpenShift. The log that will now be shown upon successful creation and will show you the url and the credentials that you need to operate it. Prior verions only showed this for embedded cartridges. Beta2 will also show these when you create applications.
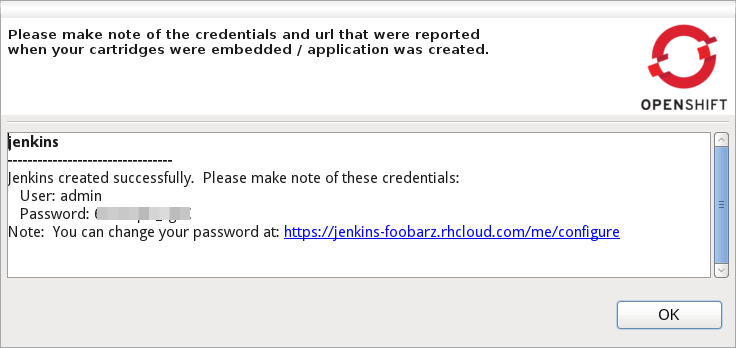
Related JIRA: JBIDE-14945
Marker Wizard
Edit your Markers
OpenShift is using markers to enable or disable features. The switch to disable the maven build that we discussed above is one of these markers. The markers are files that you add to the <project>/.openshift/markers directory. In Beta2 we allow you to add and remove these markers by invoking a wizard from the Project- or Package-Explorer.
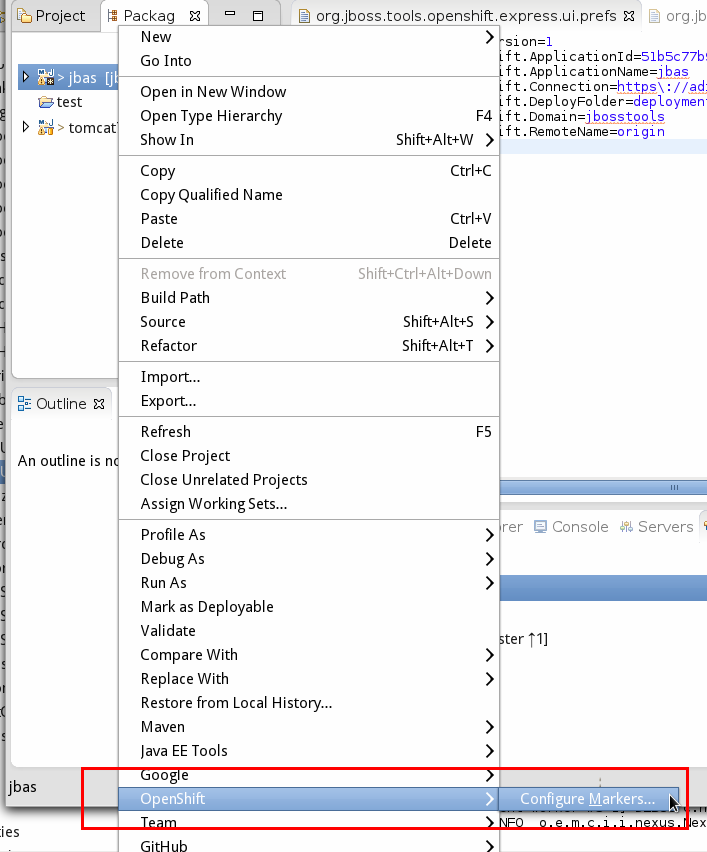
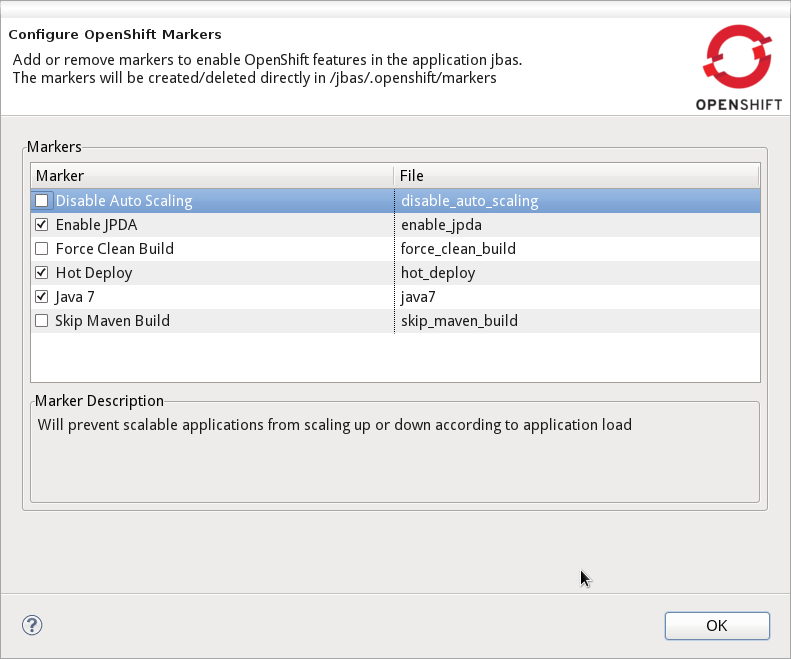
We show you all markers that already exist in the markers directory and all the ones that you may eventually want to add. The markers that we currently know about are:
| File | Effect |
|---|---|
disable_auto_scaling |
Will prevent scalable applications from scaling up or down according to application load. |
enable_jpda |
Will enable the JPDA socket based transport on the java virtual machine running the JBoss AS 7 application server. This enables you to remotely debug code running inside the JBoss AS 7 application server. |
force_clean_build |
Will start the build process by removing all non essential Maven dependencies. Any current dependencies specified in your pom.xml file will then be re-downloaded. |
hot_deploy |
Will prevent a JBoss container restart during build/deployment. Newly build archives will be re-deployed automatically by the JBoss HDScanner component. |
java7 |
Will run JBoss AS7 with Java7 if present. If no marker is present then the baseline Java version will be used (currently Java6). |
Related JIRA: JBIDE-14845
===Verbose Cartridge Names The OpenShift Explorer lists your applications and cartridges. Along with the application and cartridge it shows you the type. So far we were showing shorthand names and changed this for Beta2: the Explorer is now using verbose labels for cartridges and decorate them with the shorthand (rhc command line identifier) name.
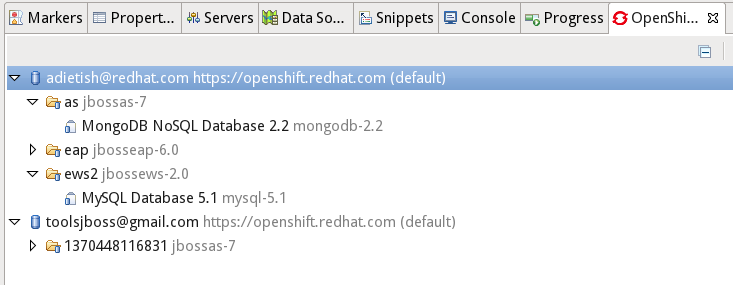
Related JIRA: JBIDE-14687
Application Logs
Tail Files pattern fixed
In order to inspect your application logs you pick "Tail Files" in the context menu of your application in the OpenShift Explorer or in the Servers view. JBoss Tools will then prompt you to provide the file pattern and options for the tail command. So far there was an issue that prevented you from limiting the output. The console was always showing the same number of lines. Fixed with Beta2.

Related JIRA: JBIDE-13894
Project Examples
Experimental Go offline script
We now provide a groovy script that pre-caches all JBoss Tools examples and their dependencies for anyone wanting to be able to work offline (after an initial online session). For instance, an instructor can download all the required dependencies and then provide a zipped .m2/repository to his students via flash drive, all students can then work offline.
A groovy command with proper arguments is generated under Preferences > JBoss Tools > Project Examples > Offline Support.
Click on the copy to clipboard button and then paste the clipboard in a terminal. An offline/ directory will be created in the directory the script is run under.
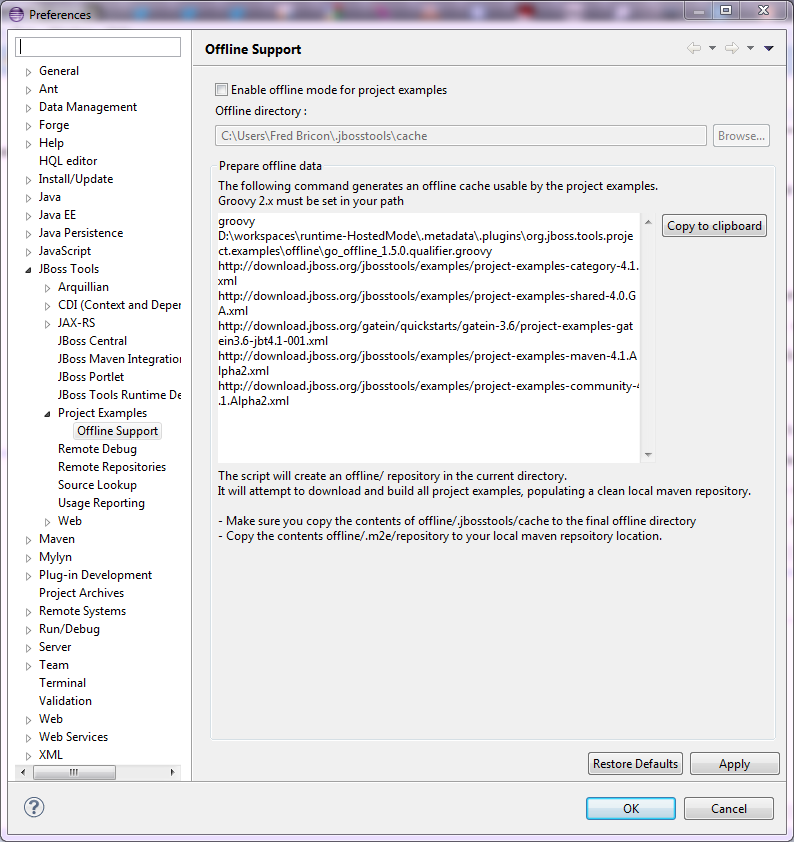
All Example archives will be downloaded under offline/.jbosstools/cache. They will then be built -if based on Maven- and the Maven dependencies will populate a clean offline/.m2/repository. The whole process takes typically around 30 minutes on a 20MB broadband connection.
The generated offline cache should be copied under ${user.home}/.jbosstools/cache (that location can be changed in Preferences > JBoss Tools > Project Examples > Offline Support). The maven repository should be copied over to your local repository.
Once the "Enable offline mode for project examples" button is checked (after saving the preferences), Examples will be fetched from the offline directory and no remote connection will be attempted to get the example data. Switching Offline mode will also switch m2e’s offline mode, if the maven examples feature is installed.
Server Tools
WildFly 8 support
wildfly.org have been announced, with builds available of WildFly 8.
New Server Type is introduced to add WildFly support for Server creation, deployment and runtime detection.
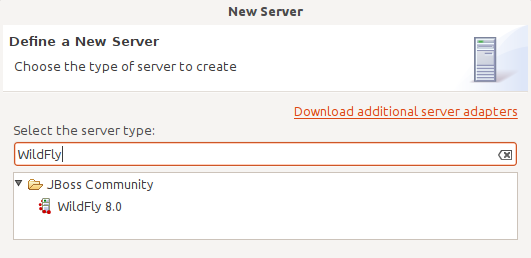
Related JIRA: JBIDE-14107
Web Services Tools
WS Tester Default Test Type Change
The WS Tester used to have JAX-WS as the default test type in the drop-down. As much of our effort has been towards RESTful services, we have changed the default test type to a RESTful GET operation.
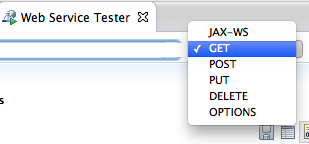
Related JIRA: JBIDE-14861
