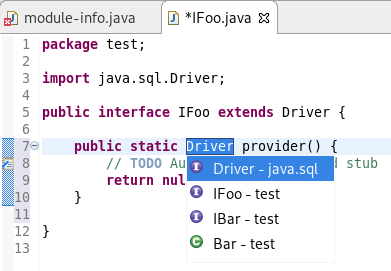
You’ve probably heard about Quarkus, the Supersonic Subatomic Java framework tailored for Kubernetes and containers.
We wrote an article on how to create your first Quarkus project in an Eclipse based IDE (like Red Hat CodeReady Studio).
You’ve probably heard about Quarkus, the Supersonic Subatomic Java framework tailored for Kubernetes and containers.
We wrote an article on how to create your first Quarkus project in an Eclipse based IDE (like Red Hat CodeReady Studio).
JBoss Tools 4.11.0 and Red Hat CodeReady Studio 12.11 for Eclipse 2019-03 are here waiting for you. Check it out!
Red Hat CodeReady Studio comes with everything pre-bundled in its installer. Simply download it from our Red Hat CodeReady product page and run it like this:
java -jar devstudio-<installername>.jar
JBoss Tools or Bring-Your-Own-Eclipse (BYOE) CodeReady Studio require a bit more:
This release requires at least Eclipse 4.11 (2019-03) but we recommend using the latest Eclipse 4.11 2019-03 JEE Bundle since then you get most of the dependencies preinstalled.
Once you have installed Eclipse, you can either find us on the Eclipse Marketplace under "JBoss Tools" or "Red Hat CodeReady Studio".
For JBoss Tools, you can also use our update site directly.
http://download.jboss.org/jbosstools/photon/stable/updates/
Our main focus for this release was improvements for container based development and bug fixing. Eclipse 2019-03 itself has a lot of new cool stuff but let me highlight just a few updates in both Eclipse 2019-03 and JBoss Tools plugins that I think are worth mentioning.
When you need to defined a new OpenShift connection, you need to provide the following information:
cluster URL
username and password or token
If you’ve already logged in your cluster through the OpenShift Web Console, you can copy an oc command
in the clipboard that contains both the cluster URL and your token.
So, from now, there is a new option that allows you to initialize the wizard fields from the copied oc
command:
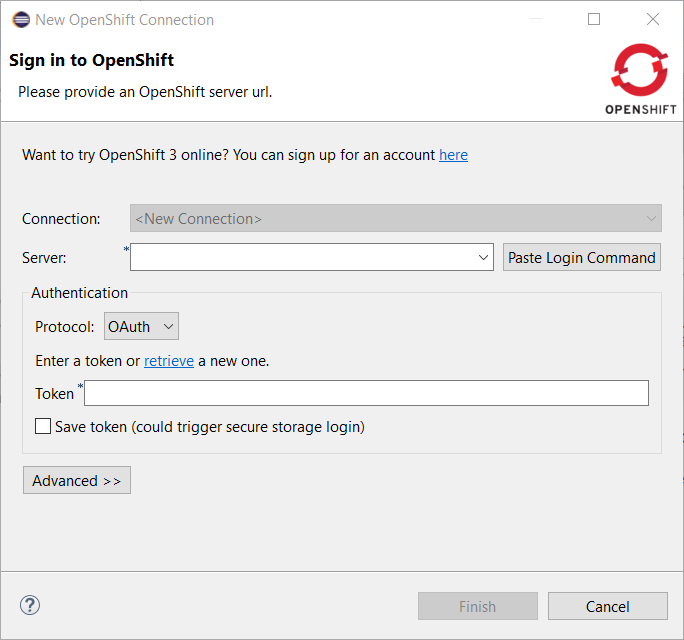
Click on the Paste Login Command button and the fields will be initialized:

A server adapter has been added to work with Wildfly 15. It adds support for Java EE 8.
Related JIRA: JBIDE-26502
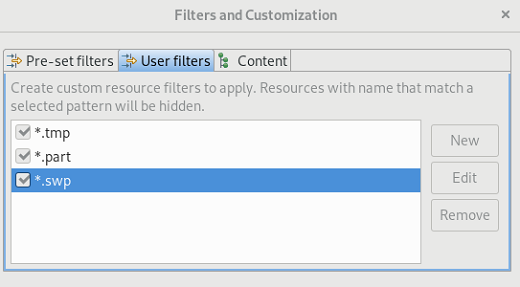
The Filters and Customization… menu in Project Explorer now shows an additional User filters tab which can be used to exclude some resources from Project Explorer based on their name.
Full name and regular expressions are supported.
The Error Log view has been moved from the PDE project to the Platform project. See bug 50517 for details.
A copy to clipboard action has been added to all tabs of the Installation Details dialog.

The Environment tab in a Launch configuration dialog supports copy & paste actions now. The environment variables are transferred as text data, so it is not only possible to copy & paste between two different launch configurations, but also between the launch configuration and e.g. some text editor or the command line.
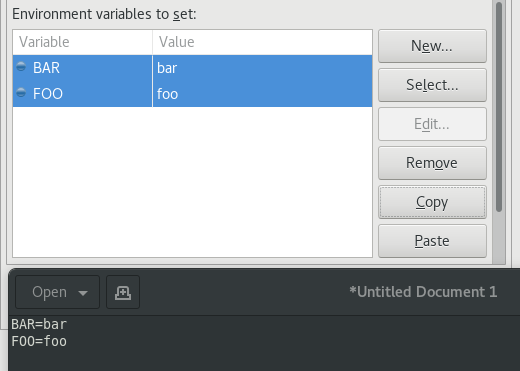
This feature is available in all launch configurations which use the common Environment tab.
When Eclipse IDE is started for the first time or with a new workspace, it may not be intuitive for new users on how to proceed. To help the users in getting started, the following useful links have been provided to add a project to the workspace:
Perspective specific project creation wizard
Generic New Project wizard
Import projects wizard

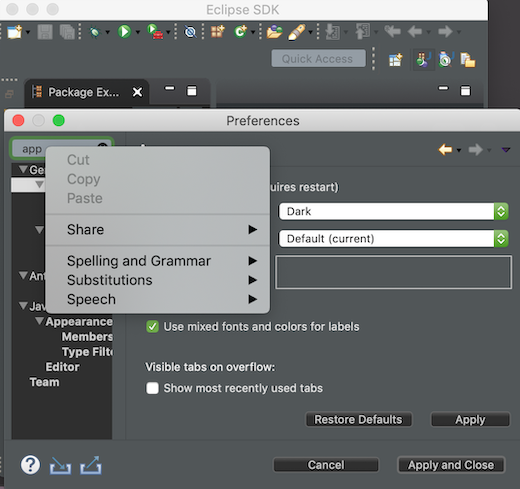
The Dark theme for Mac has been improved to use the colors from the macOS system dark appearance. Some of the notable changes in Eclipse IDE are the dark window title bar, menus, file dialogs, combos and buttons.
Note: This change is available on macOS Mojave and later.
Before:
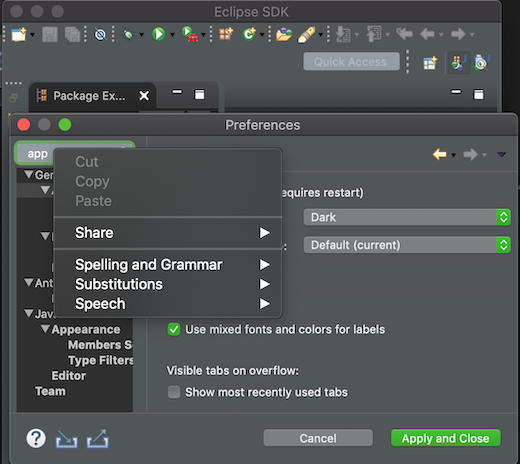
After:
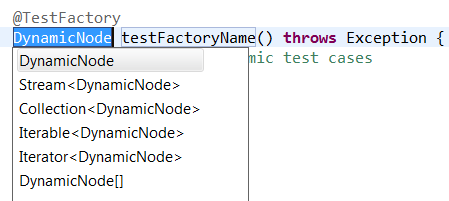
Java 12 is out and Eclipse JDT supports Java 12 for 4.11 via Marketplace. The release notably includes the following Java 12 feature: JEP 325: Switch Expressions (Preview). Please note that this is a preview language feature and hence enable preview option should be on. For an informal introduction of the support, please refer to Java 12 Examples wiki.
JUnit 5.4 is here and Eclipse JDT has been updated to use this version.
Instead of a single line wrapping setting for binary expressions, there’s now a whole section of settings for various kinds of binary operators (multiplicative, additive, logical, etc.). There are settings for relational (including equality) and shift operators, which were not covered by the old setting. Also, string concatenation can now be treated differently from arithmetic sum.
The settings can be found in the Profile Editor (Preferences > Java > Code Style > Formatter > Edit…) under the Line Wrapping > Wrapping settings > Binary expressions subsection.

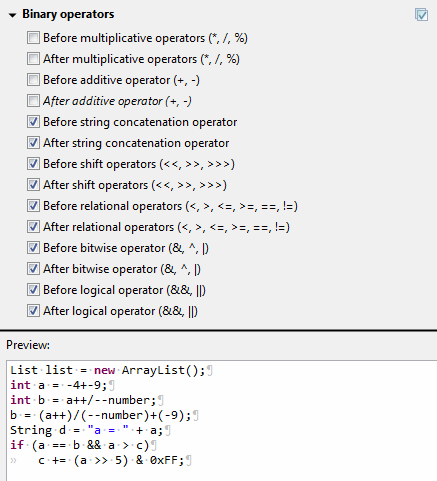
The white space around operators in binary expressions can now be controlled separately for different groups of operators, consistent with the line wrapping settings.
The new Binary operators sub-section has been added under White Space > Expressions in the Formatter profile editor.
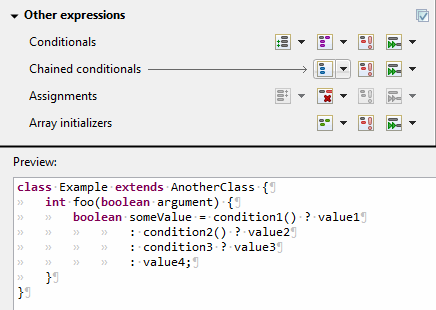
A chain of nested conditional expressions (using ternary operator) can be now wrapped as a single group, with all of them indented at the same level. It’s only possible for right-sided nesting.
Find the Chained conditionals setting in the Profile Editor under the Line Wrapping > Wrapping settings > Other expressions subsection.
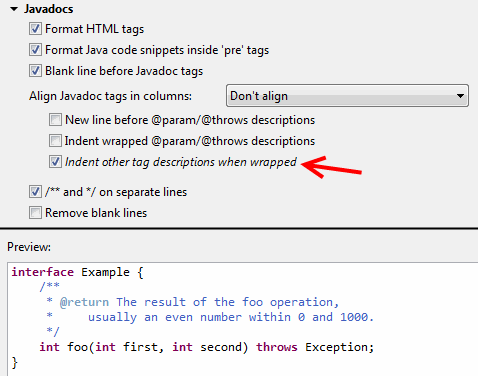
The Formatter Profile has a new setting that indents wrapped Javadoc tag descriptions.
It’s called Indent other tag descriptions when wrapped, in contrast to the preexisting Indent wrapped
@param/@throws descriptions setting. It affects tags like @return@deprecated
The settings can be found in the Profile Editor (Preferences > Java > Code Style > Formatter > Edit…) under the Comments > Javadocs section.
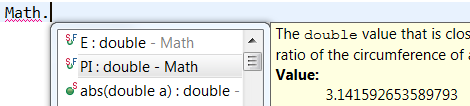
The Variables view now stores a history of the expressions used in the Detail pane. You can choose a previously entered expression for a variable from the new drop-down menu. The expression will be copied to the Detail pane where you can select it to perform various actions present in the context menu.

You can find more noteworthy updates in on this page.